
Kevin Abdi, P.Eng., PMP
Olive Contractors Inc.
Published on May 10, 2025
Last update: May 21, 2025
You may have seen these strange-looking fans and coverings set up in condo hallways or at the front door of a house and wondered—what are those things? They’re called blower doors.
In this article, we’ll break down how a blower door works and how it can actually help you find water leaks inside your home faster and more accurately.
What Is a Blower Door?
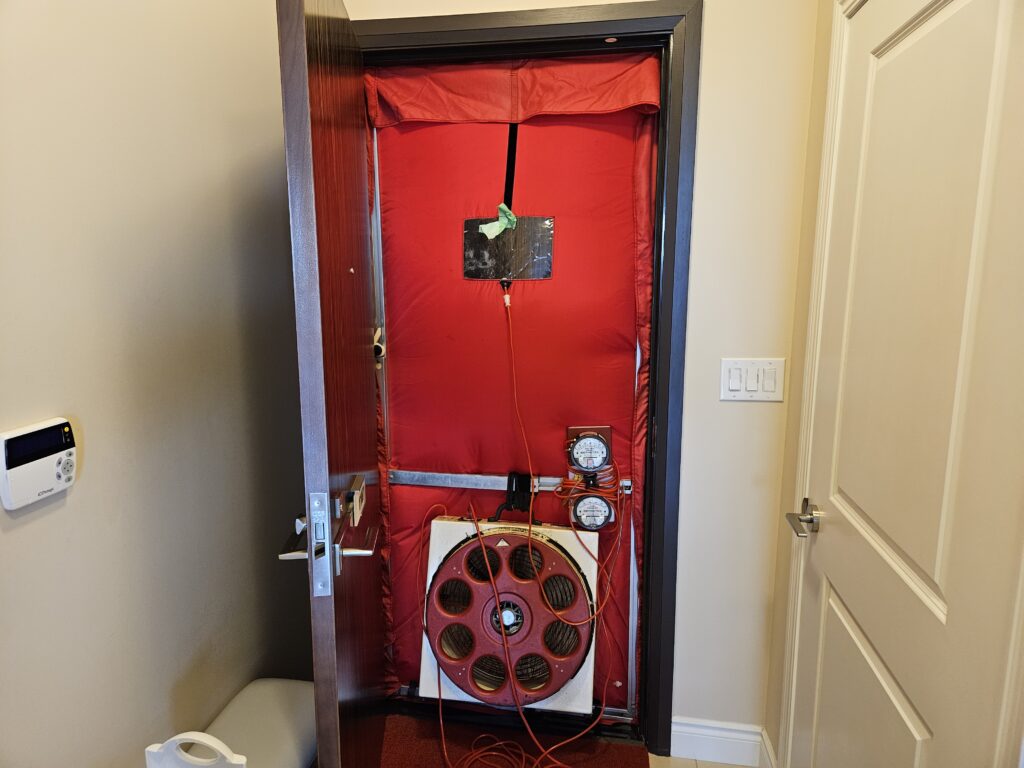
A blower door assembly is a large, high-powered fan mounted temporarily in a doorway to create pressure differences between indoors and outdoors. The setup includes:
- An adjustable aluminum frame that fits into most door openings
- A reinforced nylon air-sealing cover
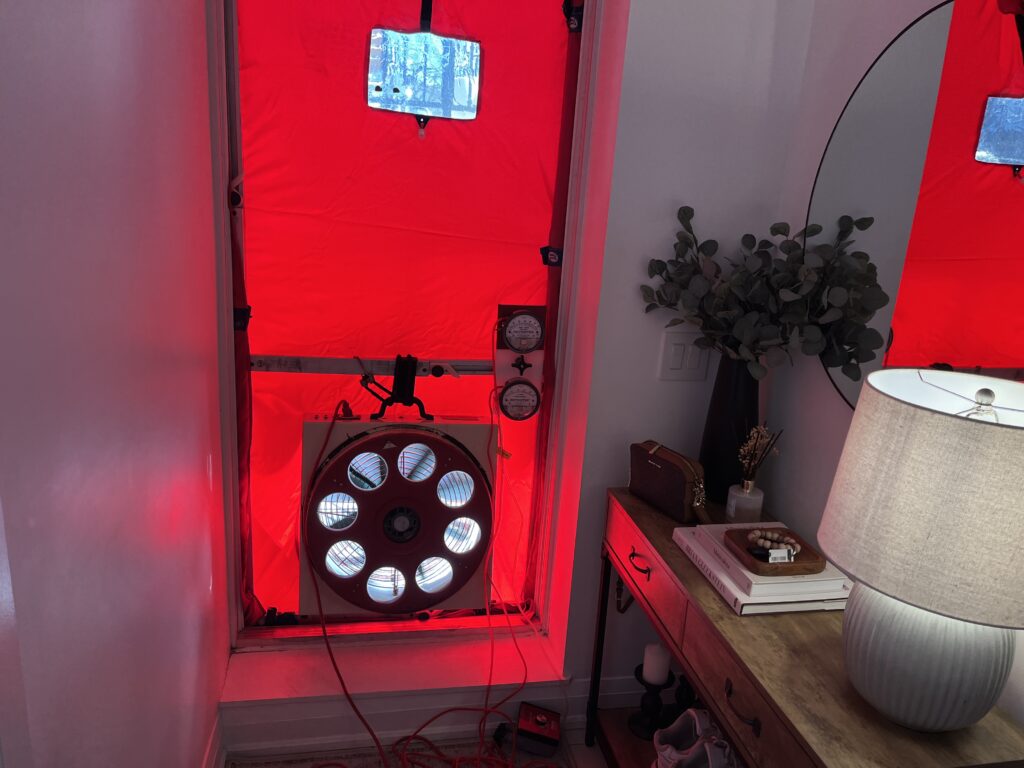
- A powerful fan unit (Figure 1)
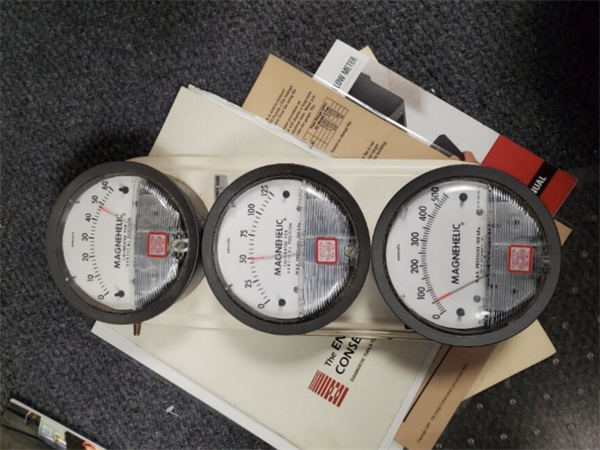
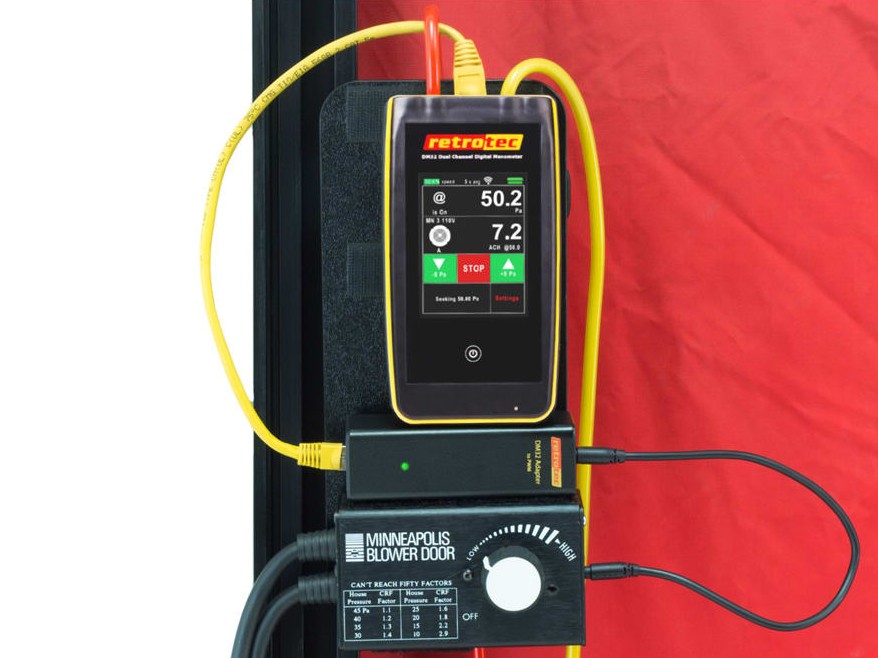
To set it up, you install the frame in a doorway, attach the nylon cover, and then insert the fan into a pre-cut hole in the fabric. Tubes are connected to the fan and one passes through to the opposite side of the cover—this allows a connected gauge to read the pressure difference. Both analog and digital gauges exist, but we’ll keep it simple for this article (Figures 2 and 3).
How a Blower Door Helps Detect Wall Leaks
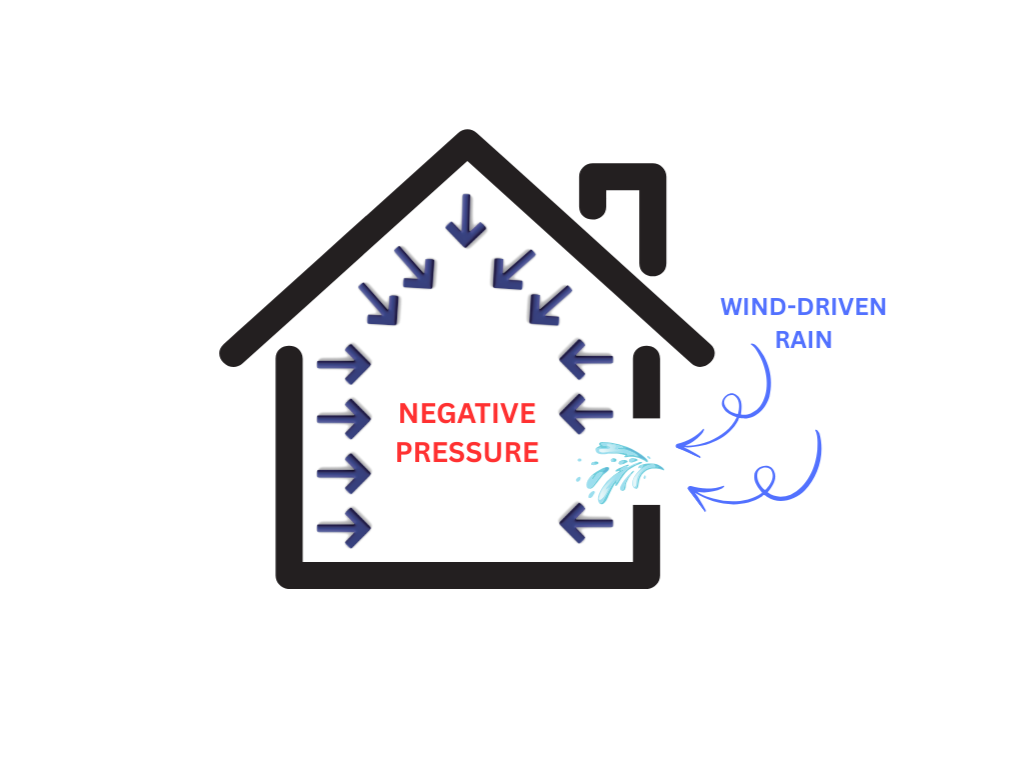
In simple terms, a blower door pulls air out of a room, creating lower air pressure inside. This causes outside air (and water) to push its way in through any unsealed cracks, gaps, or weak points in the wall system.
While blower doors are mainly used for energy audits and measuring air leakage for building performance or indoor air quality (IAQ), they’re incredibly useful during water testing, especially when you need faster, more conclusive results.
According to a study by Allstate, 42% of all property claims from 2019 to 2022 were due to water damage. That’s a huge number, and it shows just how critical it is to test for leaks properly.
We previously discussed basement water testing and how to fix those issues (read: How to Fix Basement Leaks). This article focuses on using a blower door to boost the accuracy and speed of your water testing.
Whether you live in a house or condo, you may have dealt with water leaking in through walls, ceilings, or windows. Often, the water finds its way in through multiple sources at once, which makes it frustrating to pinpoint the exact problem.
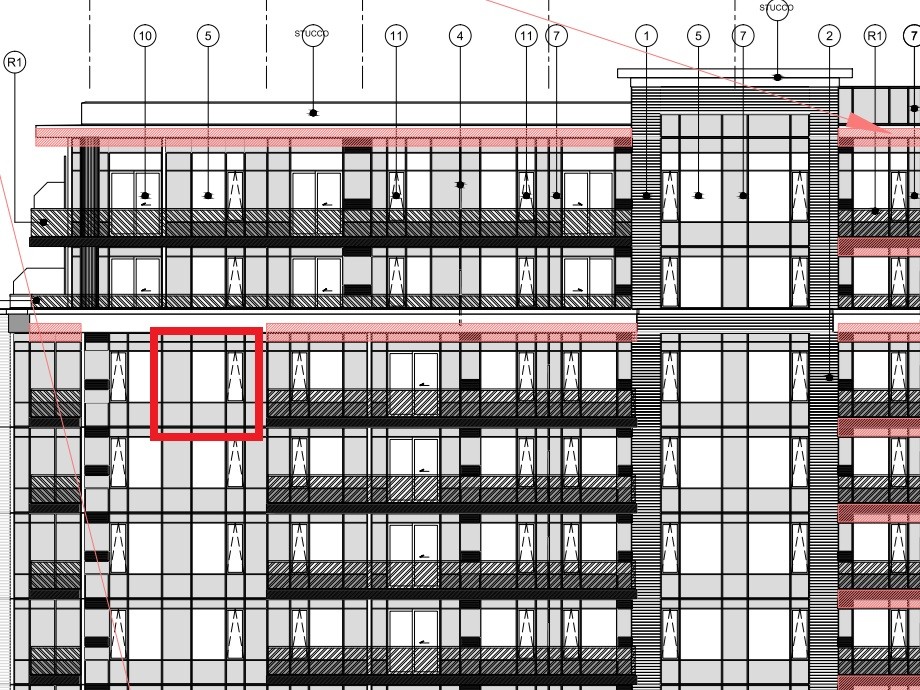
That’s where blower-assisted water testing comes in. Traditional testing involves spraying specific areas from outside while monitoring for leaks on the inside. This works well in simple cases, like water seeping through a basement wall, but becomes challenging when multiple assemblies (windows, balconies, walls) are involved (Figure 4).
In complex cases, testing becomes a process of elimination. You isolate parts of the structure, test them one by one, and rule out components that don’t leak. But water doesn’t show up instantly—it travels slowly through wall assemblies. Especially in condos, water may leak from a unit above before reaching yours. That delay turns testing into a nightmare.
By installing a blower door in the space you’re testing, you create negative air pressure inside. This simulates a wind-driven rain condition, encouraging water to migrate inward faster. A pressure difference of 50 Pascals is typically used—it may sound small, but it simulates wind at around 32 km/h (20 mph). That’s enough to draw water through even small cracks or gaps (Figures 5 and 6).
Case Study: Water Leaks Into a Lower Unit of a Stack Home
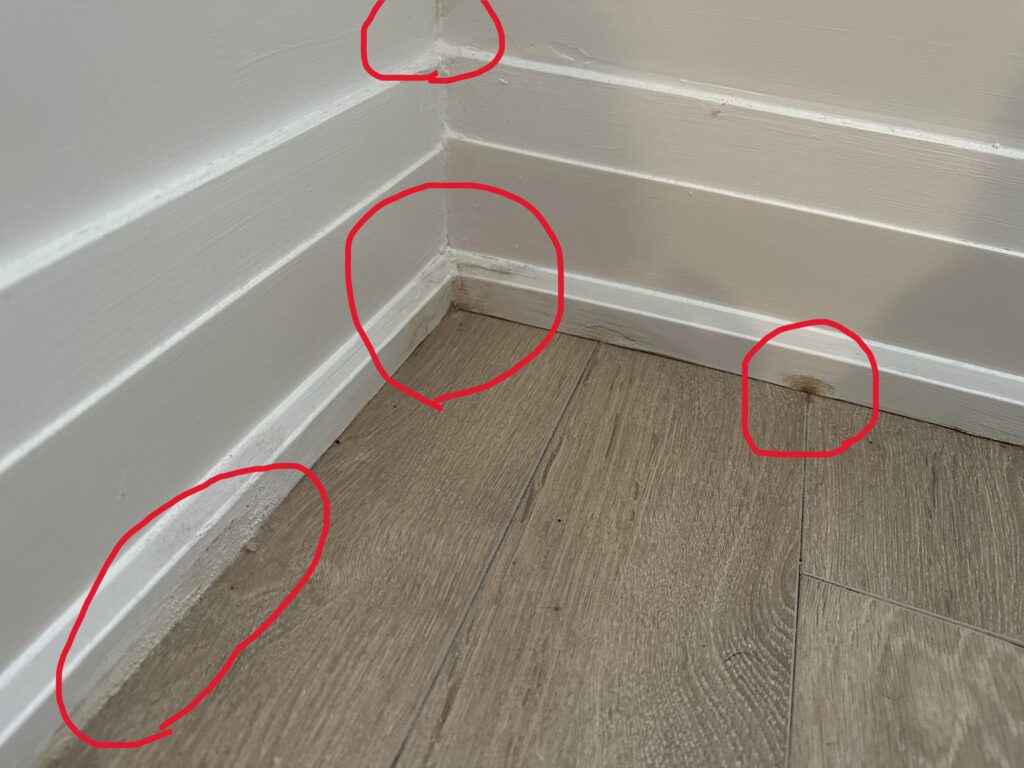
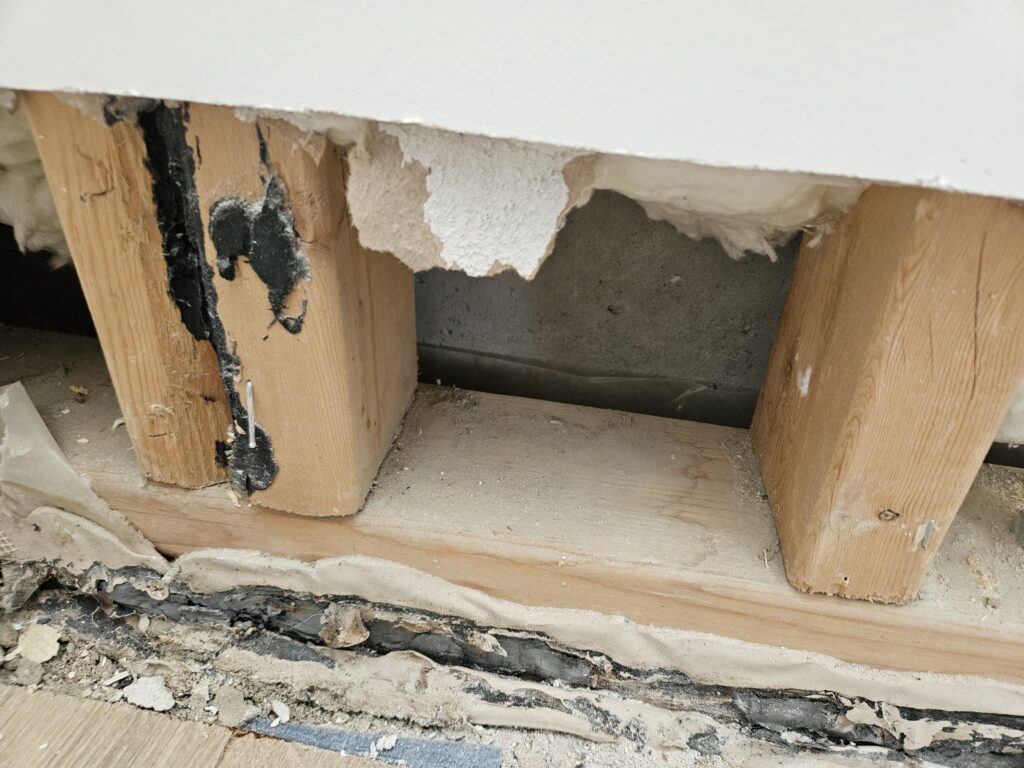
A homeowner in a basement-level stack home reported water stains and damage on the baseboards and wall finishes after heavy rainfall (Figure 7). The leak appeared to be coming from a road-facing wall with a large window.
We were called in to identify the source of the leak and recommend a solution. Since the home was still under Tarion Warranty, the repair responsibility fell to the builder.
The wall in question backed onto a concrete stairwell. Multiple assemblies had to be tested individually—so we used a blower door to help simulate wind-driven rain and speed up the process.
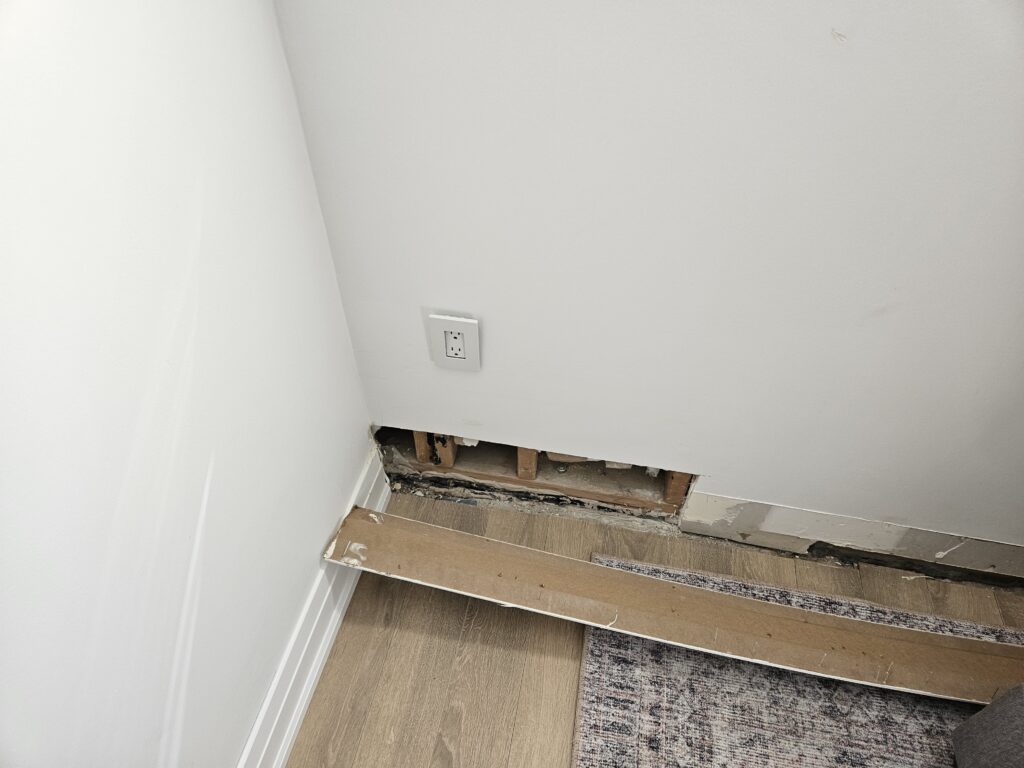
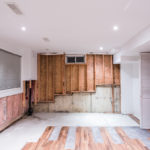
Before testing, we removed the baseboard and part of the drywall to monitor the interior wall during the test (Figure 8). Because the test was done on a dry day (no rain for 24+ hours), we confirmed there was no pre-existing moisture in the wall (Figure 9).
The blower door was installed at the main entrance (Figure 10), and all other windows, vents, and doors were sealed. The fan was powered up gradually until we reached a 50 Pascal pressure difference.
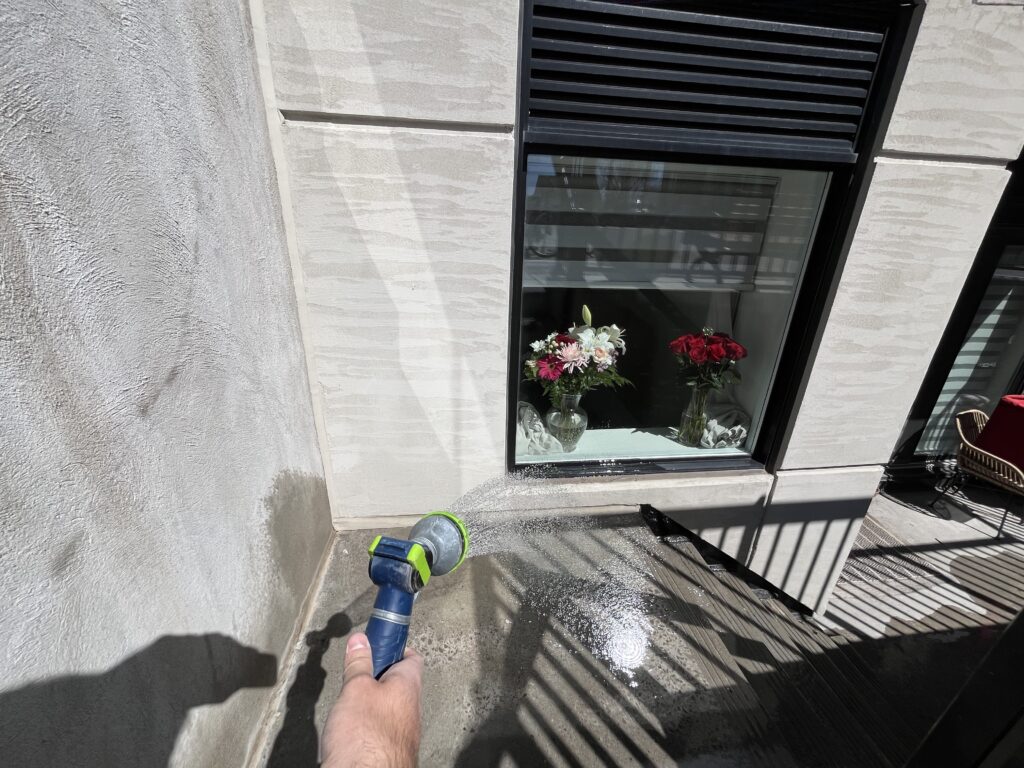
Meanwhile, another crew member began spraying the lower portion of the exterior wall, starting at the base of the stairs (Figure 11). Following the process of elimination, we did NOT spray the window initially. This ensured that if the wall leaked on its own, we could confidently identify the wall as the source.
Within 10 minutes, water was visibly leaking into the unit—filling the gap at the sill plate in minutes (Figure 12). The test was then stopped, and the blower door setup was removed.

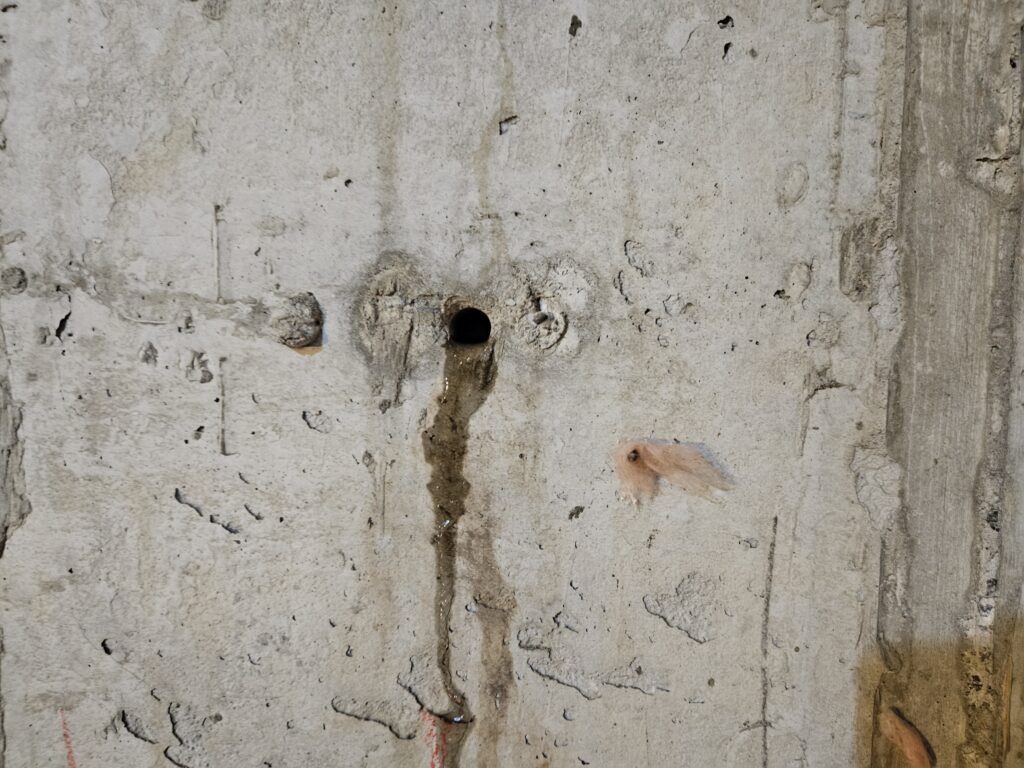
After reviewing the architectural drawings and inspecting the site, it became clear: no waterproofing membrane or through-wall flashing had been installed behind the concrete stairwell walls. Every rainfall allowed water to collect on the stairs and migrate into the unit through cracks and unsealed joints.
Needless to say, this was not an isolated issue. Similar conditions were likely present in other units, and the builder now faced hundreds of thousands of dollars in repair costs.
Important Tips When Performing a Blower Door Test
While the concept is simple, here are key things to keep in mind:
- You need two people. Installing the fan into the fabric cover can be tricky. One person should hold the fan while the other wraps the elastic around the opening securely.
- Plan ahead. Once the door is sealed, no one can go in or out from that entrance. Make sure everything needed is inside beforehand.
- Watch for poor fit. Some doors don’t create a tight seal with the blower frame. When the fan runs, the pressure may push the fabric inward. If the frame isn’t secure, the whole setup can collapse. In these cases, it’s better to place the fan behind the door frame so the door structure supports it. Use tape to seal gaps around the frame.
Final Thoughts
Water leaks can cause serious damage long before they’re visible, and identifying the source isn’t always straightforward. That’s why combining traditional water testing with tools like a blower door can make a huge difference, not just in accuracy, but in saving time and cost. If you suspect your home is leaking and want to be sure before committing to repairs, reach out. We’ll investigate it properly, give you clear answers, and help you take the right steps, without the guesswork.
Pingback: How to Fix Basement Leaks in Toronto | Exterior Waterproofing Guide for Homeowners
I enjoy you because of your whole efforts on this web page. My mom really likes doing investigations and it’s really simple to grasp why. A lot of people hear all regarding the compelling tactic you convey vital tips by means of your blog and improve contribution from other ones on that subject matter then my girl is certainly understanding so much. Have fun with the remaining portion of the year. You are always conducting a stunning job.