
Kevin Abdi, P.Eng., PMP
Olive Contractors Inc.
Published on July 31, 2025
Last update: July 31, 2025
In our recent renovation project, which upgraded a 100 plus year old Victorian house in Toronto, we faced different and quite frequent challenges that we thought were worth sharing with you.
This article focuses on the challenges that affected us the most and, subsequently, added to the overall project budget and timeline.
It’s based on first-hand experience, and the methods chosen to solve the problems were collaboratively selected with our team and the homeowner. It should be noted that while we were able to successfully complete the project and satisfy all requirements, our methods are by no means the only solutions to such roadblocks. When it comes to construction, especially when dealing with site limitations, creativity becomes a valuable commodity. So if you think of other ways to overcome construction challenges, we encourage you to leave a comment and let us know.
If you own an old home, are planning a renovation, or are simply interested in learning about the challenges of upgrading a century home, read on.
1. Removing the Load-Bearing Walls
Removing interior walls in old homes is one of the most common upgrades homeowners ask for. With changes in lifestyles and the never-ending evolution of interior design trends, layouts and open concepts are usually the first things homeowners notice. So how do you keep up with the most recent trends in interior layout? By removing or adding interior walls.
While older home designs focused on dividing spaces and enclosing service rooms, today’s layouts revolve around open concepts and shared spaces. That’s why you’ll often see kitchens behind full walls in older homes, and why newer homes feature kitchen islands exposed from all angles at the heart of the house.
Regardless of your design preference, changing the layout usually means removing or relocating walls. While adding walls is fairly straightforward, removing walls, especially load bearing walls, can be challenging and labor intensive if not planned properly and clearly communicated to the homeowner in advance.
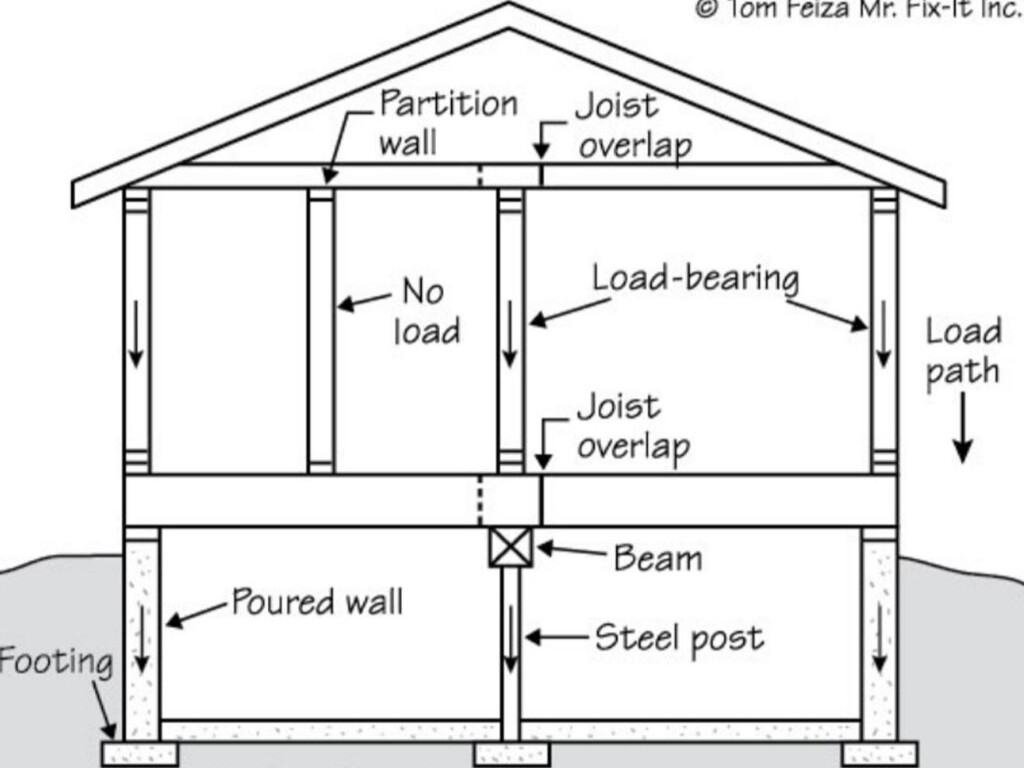
For those unfamiliar with the term, there are two types of interior walls: load bearing and non load bearing. Non load bearing walls only support their own weight and act as space dividers. Load bearing walls, on the other hand, support the structure above them, typically the floor joists and wall assemblies. These walls are part of the structural system of the house, so when you remove them, you must provide the same level of support. In our case, we typically install built up wood beams and posts to preserve structural integrity while opening up the space.
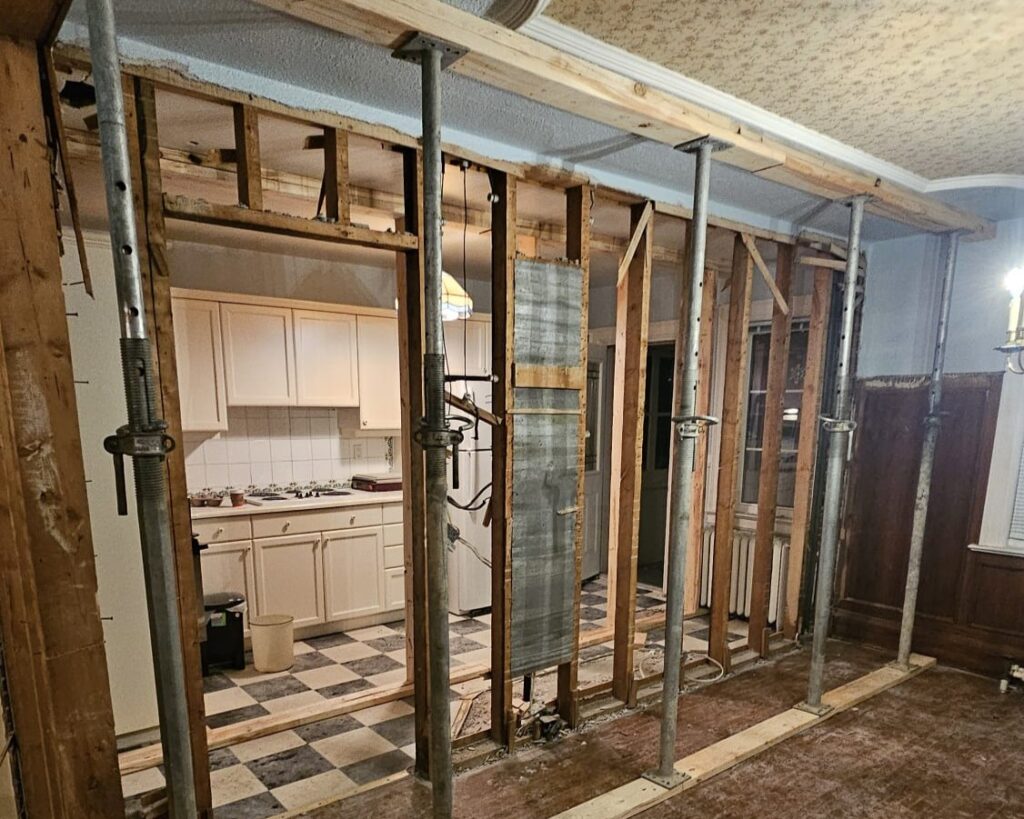
When we removed the kitchen walls for this project, we knew we were dealing with a load bearing wall. It was right in the middle of the house, where the floor joists intersected and were supported by the wall framing. We prepared accordingly with shoring jacks on both sides to temporarily support the floor above. But the challenge didn’t stop there.
Hidden within the wall were radiator pipes and utility lines. Imagine demolishing a wall and suddenly discovering unplanned piping inside. Luckily, we were already replacing the radiator system with a furnace and AC HVAC system, so we cut and removed the old pipes.
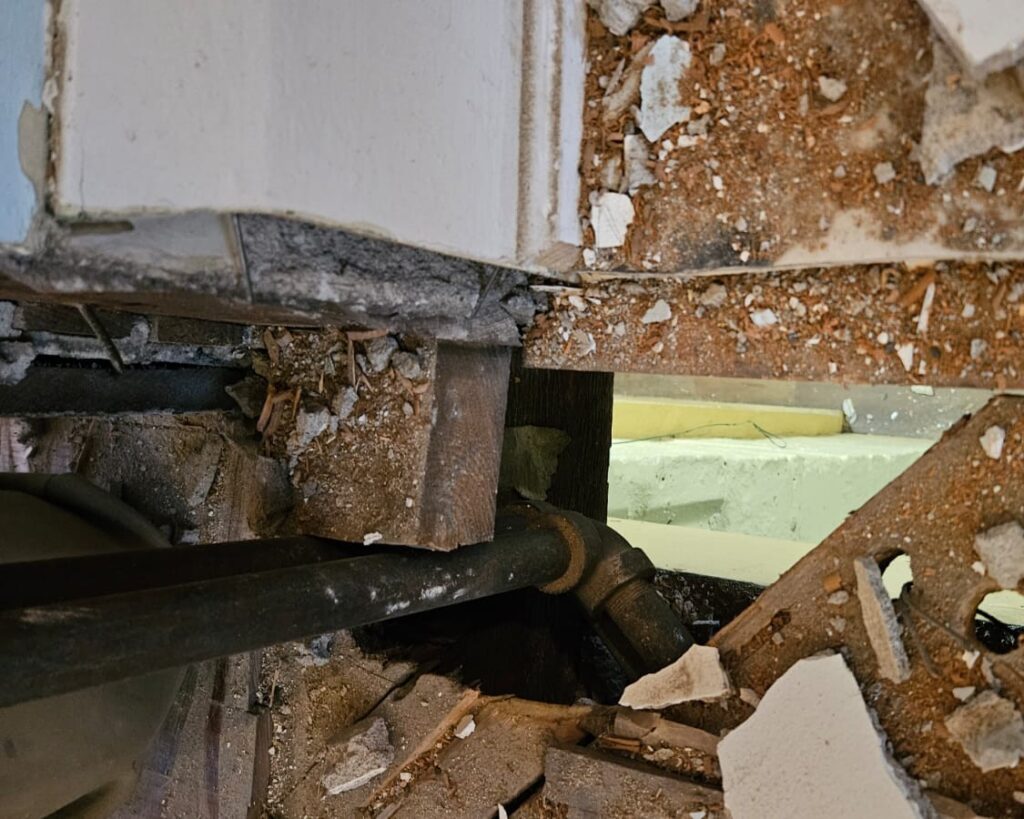
But what if you had to keep the pipes functional? That’s where things get tricky when pricing out wall removal. In addition to the radiator pipes, there was a galvanized steel water pipe directly above the wall, right where we were supposed to install our new beam. And we had no plans to remove that water supply line.
We spent an extra day and additional budget to reroute the pipe so it wouldn’t interfere with the new beam. Later, we reconnected it using PEX through a precisely drilled hole in the beam. That may sound simple, but working with an old galvanized pipe in a tight space between joists, threading the ends for fittings, and drilling through four LVL beams with high precision was extremely difficult. Getting galvanized to work with PEX was no small feat.
Lessons Learned
When estimating a budget for wall removal, always include a buffer for hidden conditions. There’s a good chance of finding metal pipes concealed in old walls.
If you want peace of mind, consider making exploratory openings before demolition to confirm wall construction and check for hidden utilities. It helps reduce surprises and improve cost accuracy.
2. Lath and Plaster Walls (vs. Drywall)
Another challenge in old homes is the lack of drywall. Homes built before the 1950s typically used lath and plaster construction. This method involved fastening narrow wood strips (lath) to the studs, then covering them with layers of plaster made of lime or cement.
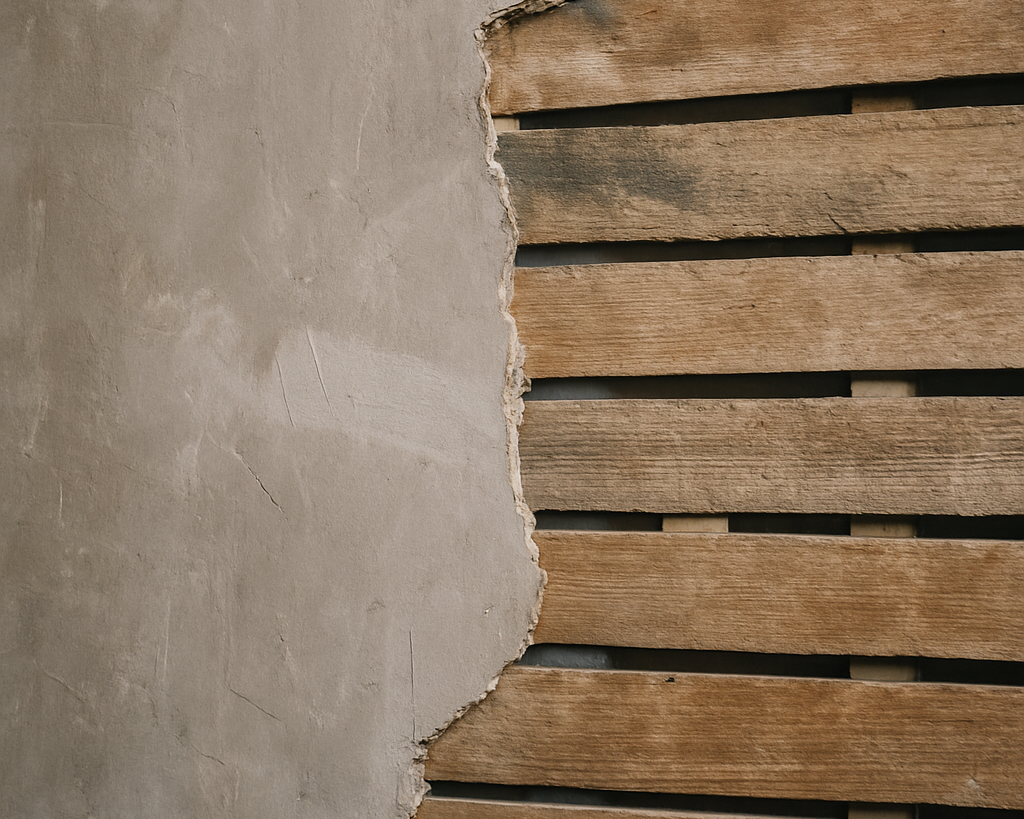
If you knock on the walls in an old house, they’ll feel more solid than modern drywall. That’s because of the thick, solid lath and plaster construction. These walls also offered benefits like better soundproofing and fire resistance.
However, if you’re the contractor who has to repair or remove them, I feel for you. While drywall can often be removed with a knife or even your hands, lath and plaster removal is far messier and more physically demanding. Expect lots of dust, debris, and broken blades.
For wall removals in the bathrooms and other areas, we used sledgehammers and more manpower. To cut smaller sections, we used a Sawzall, but we broke about 20 blades during the process.
Also, once you remove these walls, you expose irregular and uneven framing behind them. Due to their thickness, lath and plaster walls hide many imperfections. So if you’re patching with drywall, you’ll likely need to modify the framing to ensure a flush installation.
Watch this TikTok video on how difficult it is to work with lath and plaster finishes: https://www.tiktok.com/@renovationguru/video/7471395969670581509?is_from_webapp=1&sender_device=pc&web_id=7533335282486904325
Lessons Learned
If the walls in an old house feel rock solid when you knock on them, they’re probably lath and plaster. Be prepared for a messy, labor-intensive removal process. You’ll also need to budget time and effort for reframing if you’re patching with drywall.
3. Galvanized Water Supply Pipes
As mentioned earlier, it’s common to find galvanized steel water supply pipes in older homes. While modern homes use flexible PEX piping, older systems relied on rigid galvanized pipes connected with threaded steel fittings.
When renovating these systems, you may face challenges modifying them. Galvanized pipes can crack at the fittings, especially after years of pressure. They also corrode internally, leading to low water pressure and added strain on the system.
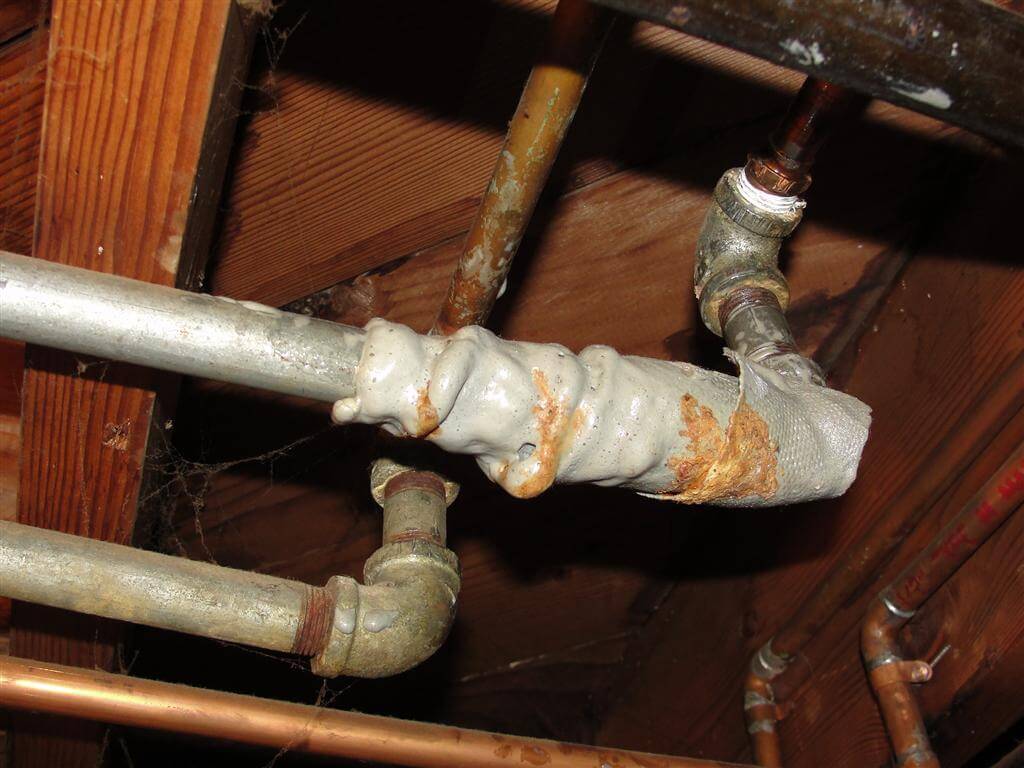
If you’re replacing or rerouting pipes, you’ll likely need to transition from galvanized to PEX using brass adapters. But threading galvanized pipes can be tricky, especially if the pipe is located in tight spots between floor joists. This connection method is possible but not ideal.
As a rule of thumb, mixing two different plumbing systems increases the risk of failure. That’s why many homeowners choose to replace the entire water supply system with PEX during a renovation. PEX is easier to work with, requires fewer tools, and provides a more reliable long term solution.
Lessons Learned
If plumbing upgrades are substantial, it’s worth discussing full pipe replacement with the homeowner. Yes, it might mean opening up walls and ceilings, but it gives peace of mind.
If full replacement isn’t an option, clearly communicate the extra effort needed to make reliable connections between old and new systems.
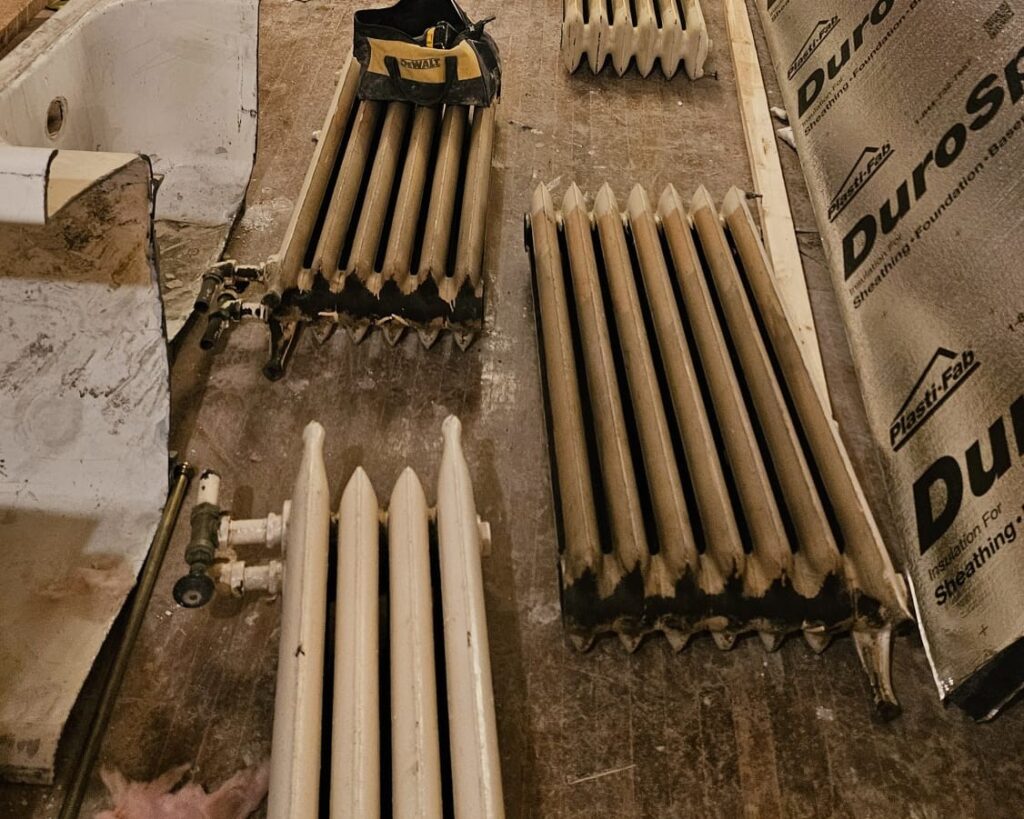
4. Radiator Heating Systems
Radiators look charming in older homes and add character to heritage properties, but they come with downsides.
Radiator systems work with boilers that pump hot water through cast iron pipes. These systems take time to heat up and cool down, making precise temperature control difficult. Over time, rust and corrosion build up in the pipes, increasing the risk of leaks and making disassembly difficult.
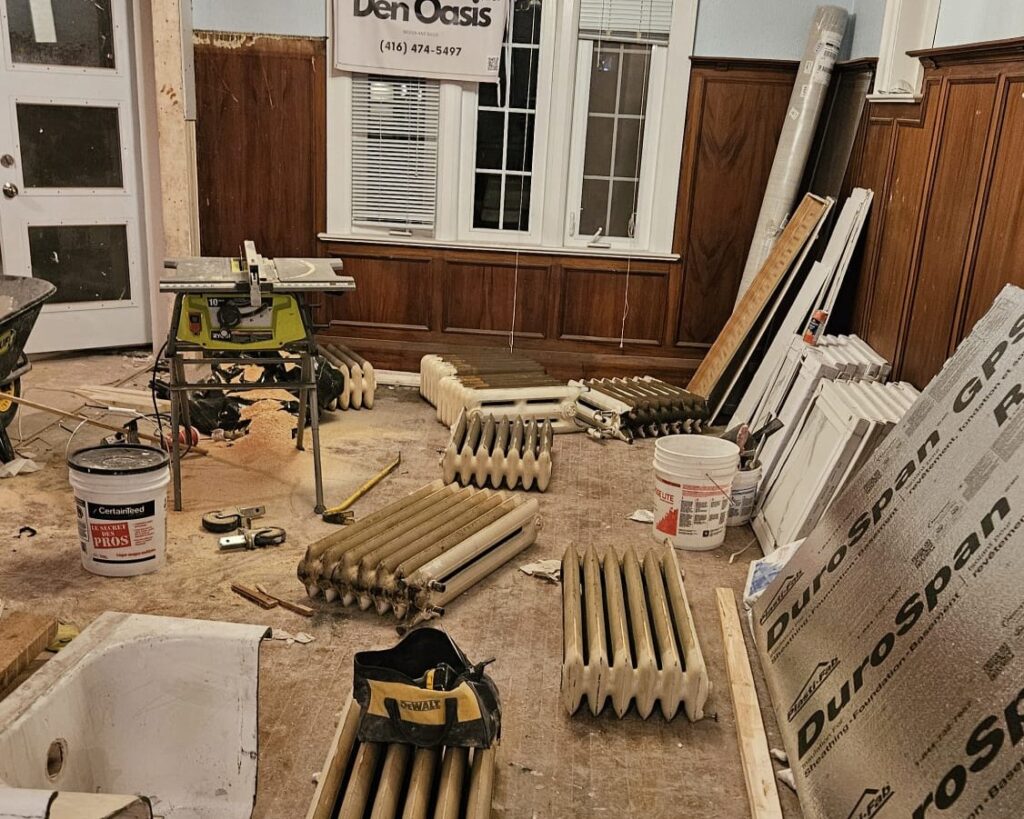
In our project, we replaced the radiators with a more modern HVAC system. That meant removing all the cast iron radiators and their pipework. If you’ve never handled one of these before, be warned, they are extremely heavy. A typical radiator weighs between 150 to 200 pounds. Removing them from upper floors and carrying them down to the main level was a massive undertaking.
Lessons Learned
We removed 8 radiators from two floors. To make them manageable, we had to cut them into smaller sections. We also had to spread the weight across the floor to avoid damaging the structure.
Removing radiators is time consuming and messy. Plan accordingly for time, labor, and cleanup.
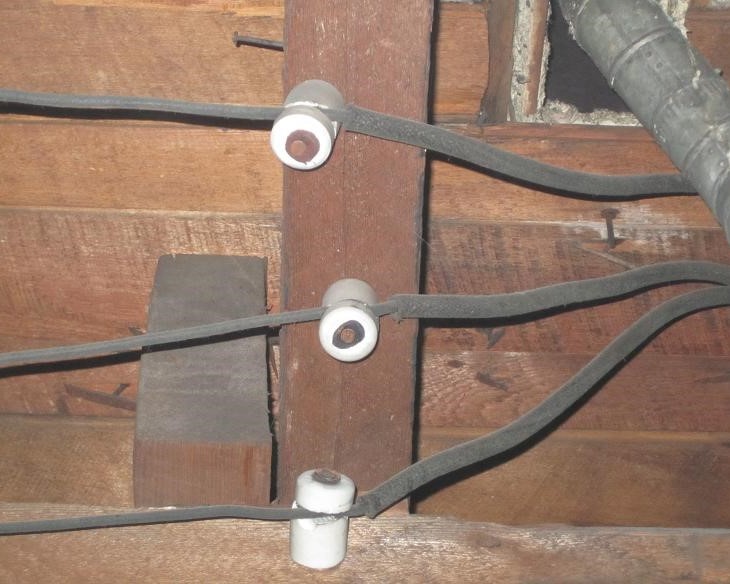
5. Electrical Panels and Wiring
This one is obvious. Old homes almost always need electrical upgrades.
Many use outdated fuse boxes with limited capacity, typically 60 to 100 amps, which aren’t suitable for modern appliances and systems. Upgrading to a 200 amp breaker panel is often necessary.
Older homes also used knob and tube wiring, which is unsafe by today’s standards. These systems are ungrounded and pose a fire risk. A full rewire using copper cables and GFCI outlets in bathrooms, kitchens, and basements is usually required.
Keep in mind, any electrical work requires permits and ESA inspections and must be done by a licensed electrician.
Lessons Learned
If your renovation project needs electrical work, start with it first. It often involves cutting into finished walls to run new wiring.
Communicate clearly with your electrician about outlet locations and wiring plans before drywall or finishes go up. Once the walls are closed, it’s too late.
Final Notes
I hope this article didn’t scare you away from upgrading or renovating an old home. This was my personal experience working on a historic Toronto house, and it was a learning journey at every step.
Though this was a long read, I only touched on some of the major challenges we encountered. There were many unexpected turns, but each problem we solved became a valuable lesson and a rewarding milestone.
Between the age of the home, the unexpected conditions, and my own learning curve in century home renovations, this project had it all. But we successfully completed it and kept our client smiling when they saw the transformation.
I wrote this article to share what I learned and hopefully shed light on what to expect when planning or pricing a renovation in an old house.
If you have any questions or want to know more about this project, leave us a comment or contact us.


When I originally commented I clicked the -Notify me when new comments are added- checkbox and now each time a comment is added I get four emails with the same comment. Is there any way you can remove me from that service? Thanks!