
Kevin Abdi, P.Eng., PMP
Olive Contractors Inc.
Published on May 4, 2025
Last update: May 21, 2025
What Does a Leaky Basement Look Like?
If you own a home, especially in the tight neighborhoods of Toronto, you’ve likely dealt with water leaking into your basement. It often appears as yellow stains on the bottom of walls, peeling paint, damaged drywall, or, worse, mold growth.
Not only does it make your basement feel musty and uninviting, but prolonged exposure to moisture can lead to chronic health issues and allergies. Basement leaks are a serious problem and more common than you think.

In this article, we’ll show you how to:
- Identify the source of basement water leaks
- Test the basement walls using a simple, homeowner-friendly water test
- Fix the problem properly with exterior waterproofing
So, make sure you read through this article and pay special attention to the steps discussed below.
Let’s dive in.
Common Signs of Basement Leaks
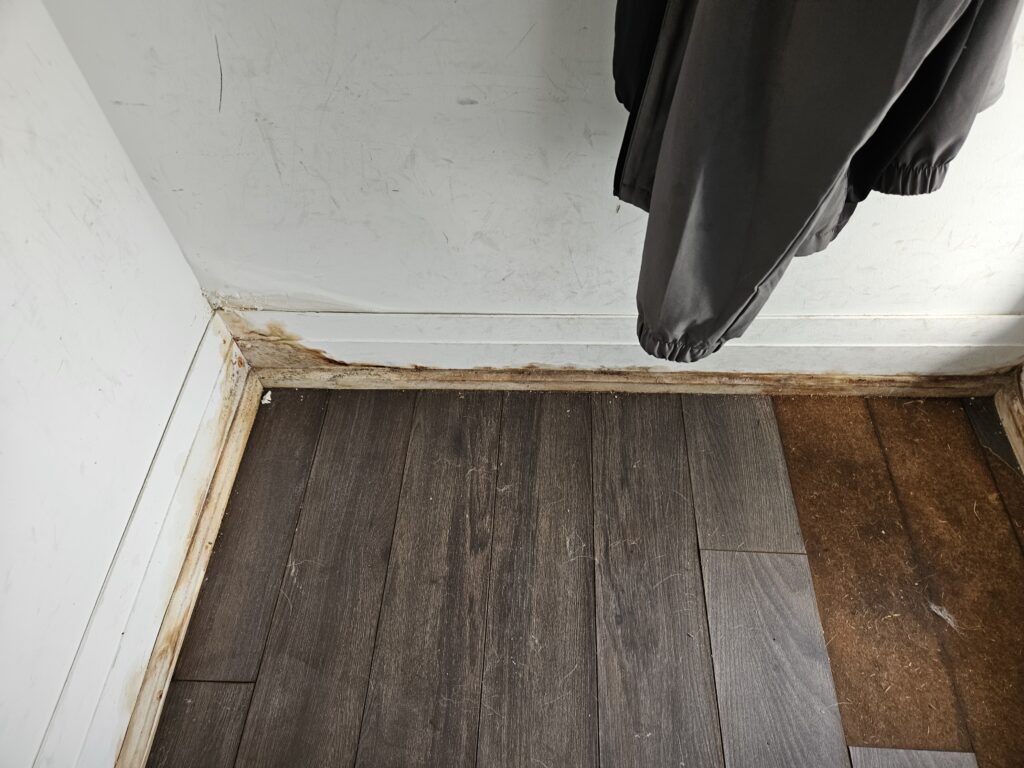
The most obvious sign of a basement leak is visible water stains or yellowish marks on your walls (Figure 1). But that’s not always the case, especially if the moisture is hidden behind drywall and insulation.
In many homes, the vapor barrier or insulation may trap moisture, preventing it from reaching the wall surface. That’s why your sense of smell can be a useful detection tool. A musty odor in your basement is a strong sign of dampness.
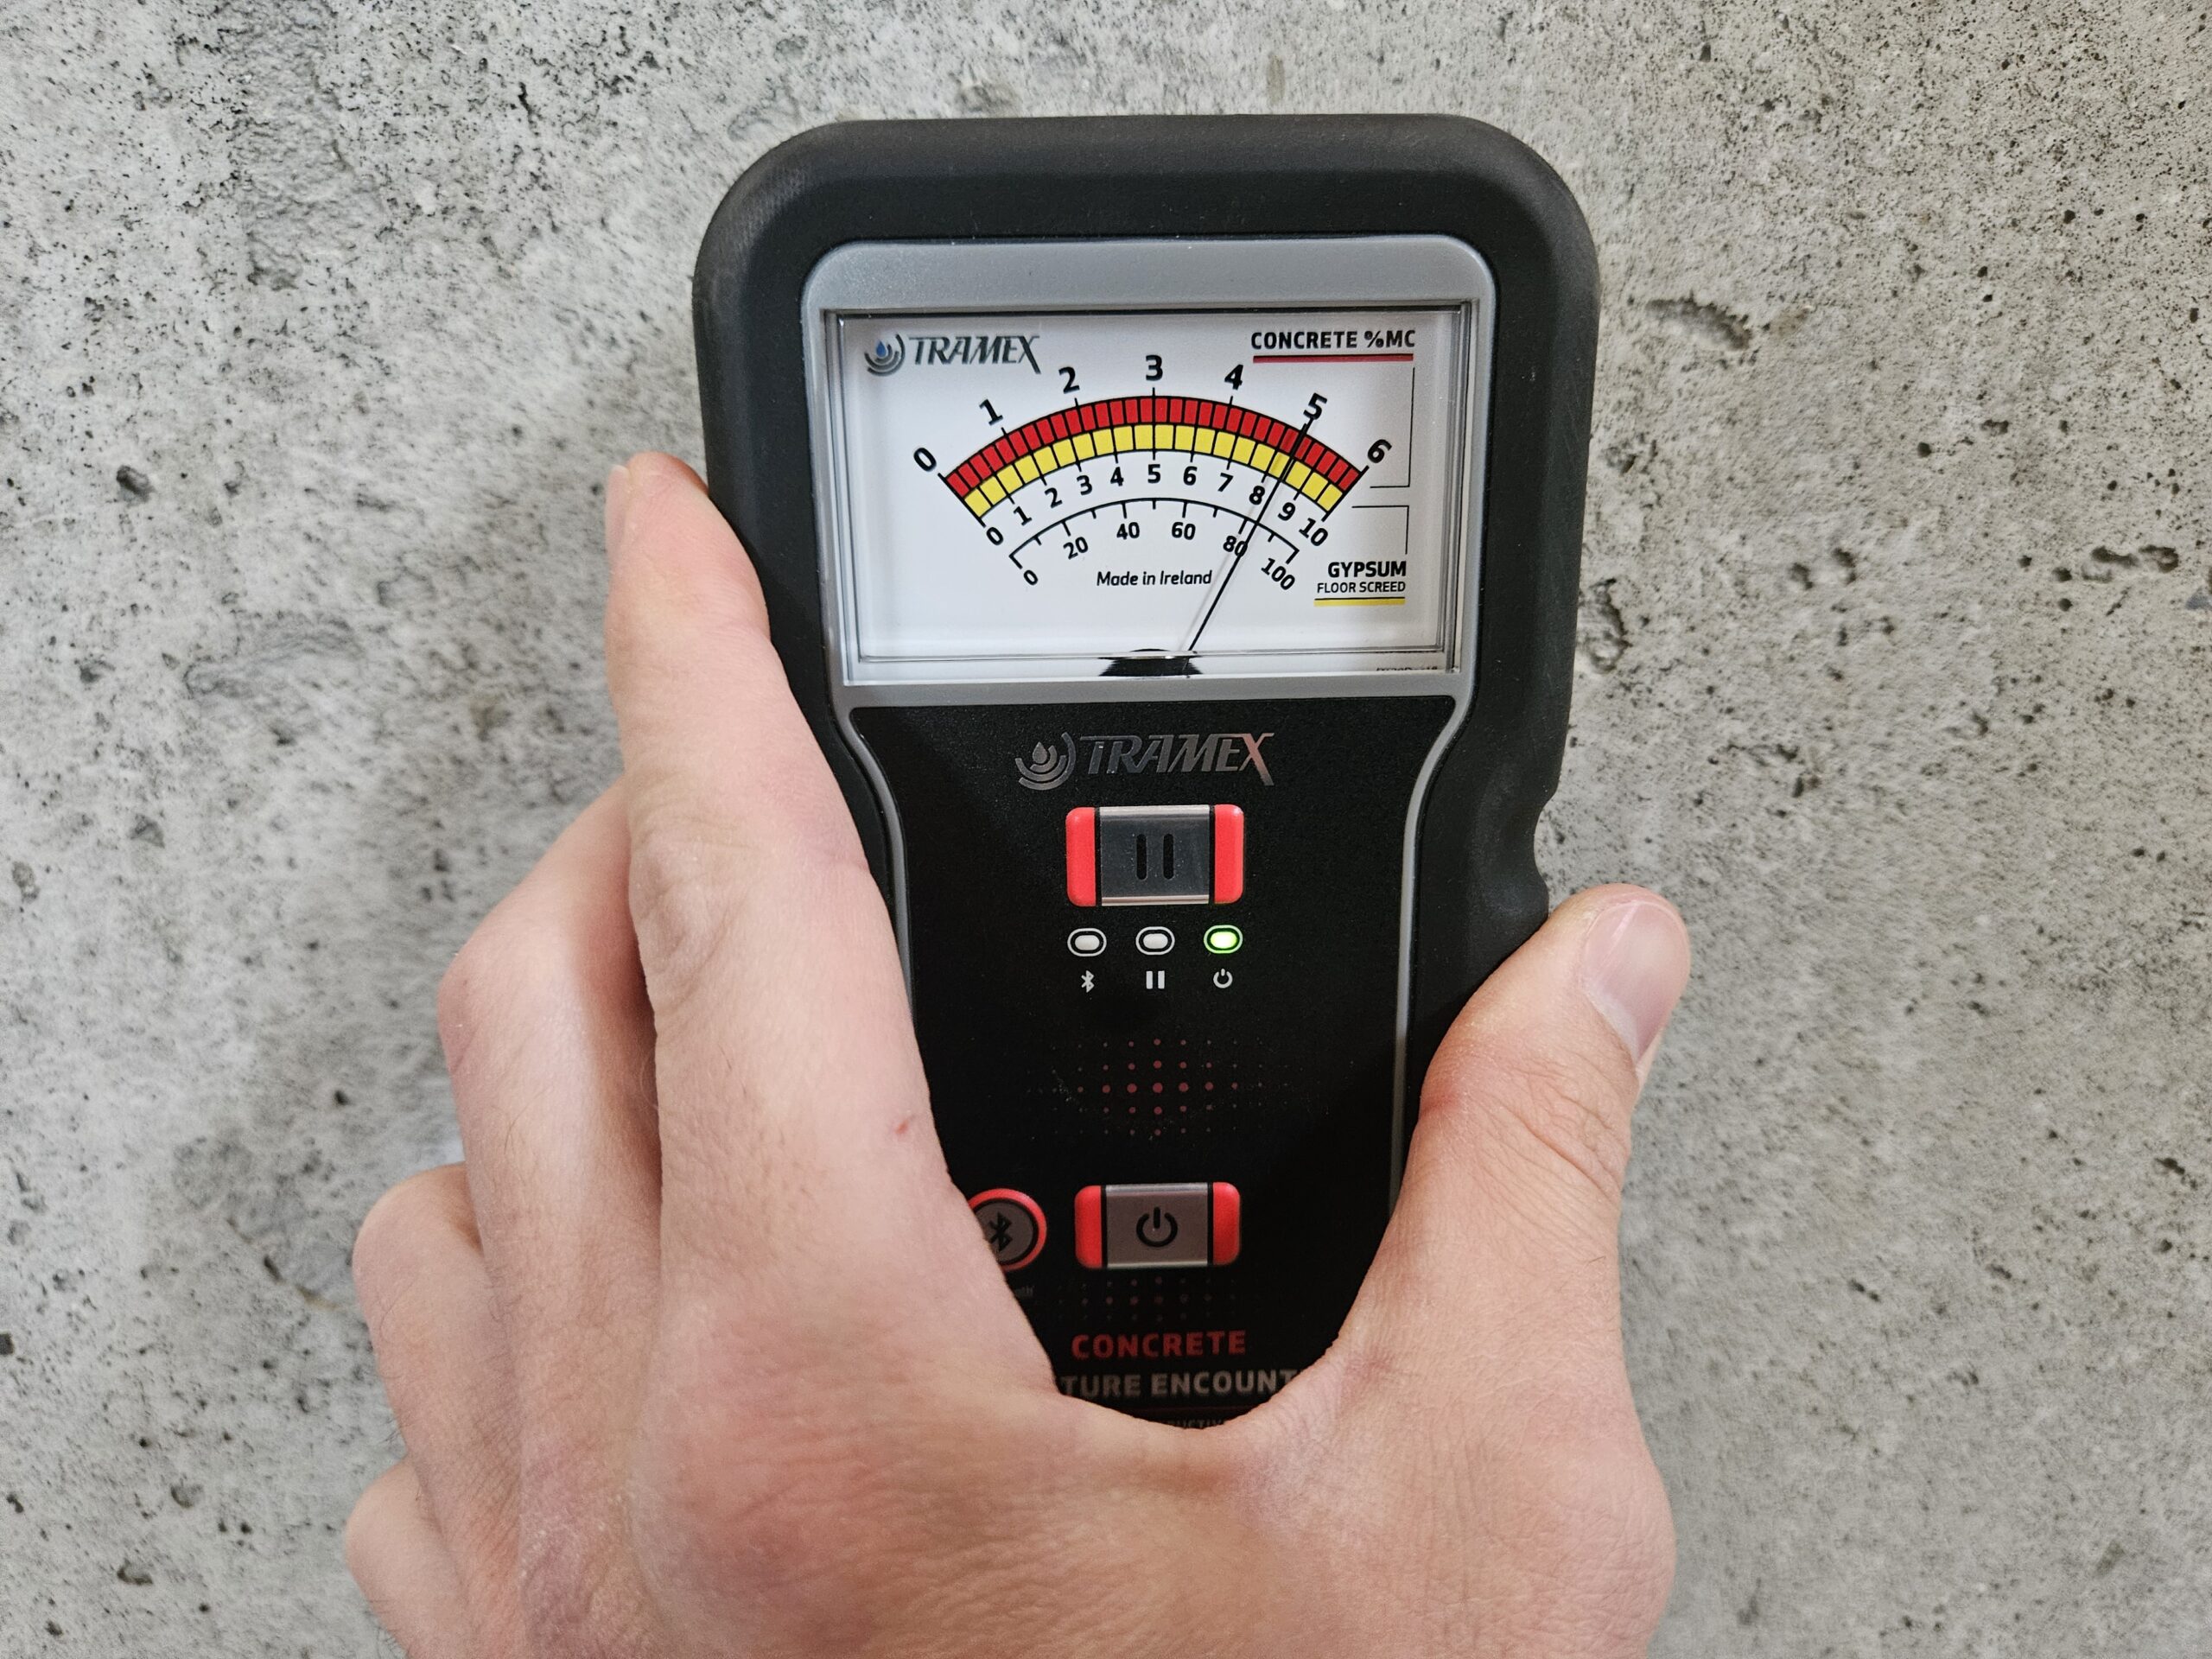
If you’re a hands-on homeowner with a collection of branded tools in your garage, you might already own a moisture meter. These tools can detect dampness inside basement walls before you see any visible signs (Figure 2).
How to Perform a Water Test at Home
Once you’ve confirmed there’s moisture or water in your basement and suspect the walls are the source, the next step is to verify it with a water test. The method explained below is a simple, homeowner-friendly way to test your basement foundation walls for potential leaks using a regular garden hose. Here’s how to do it safely and effectively:
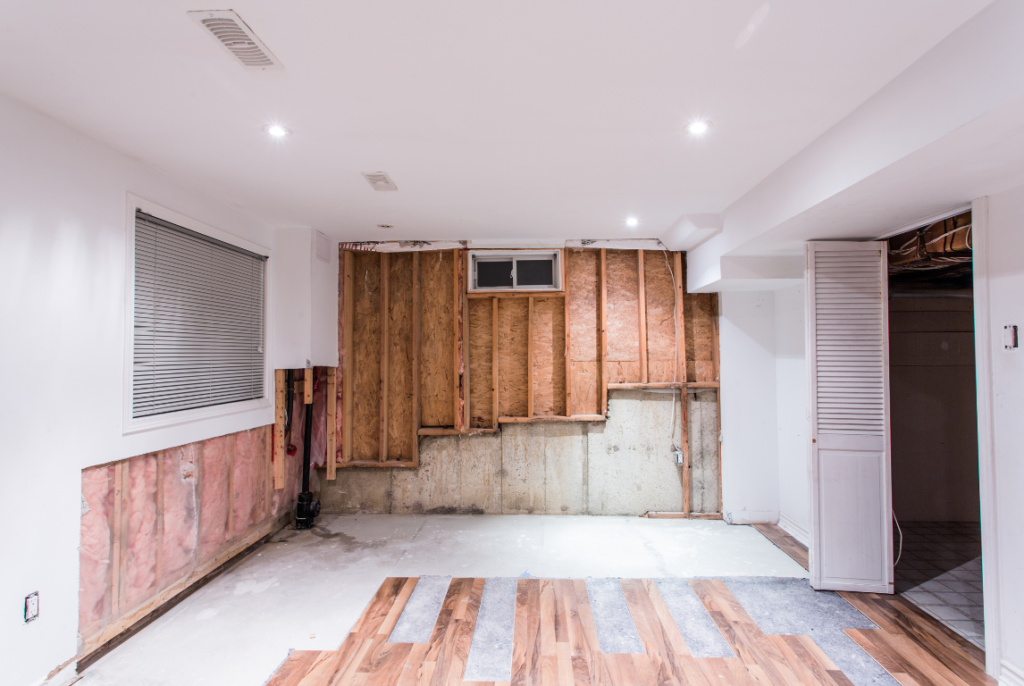
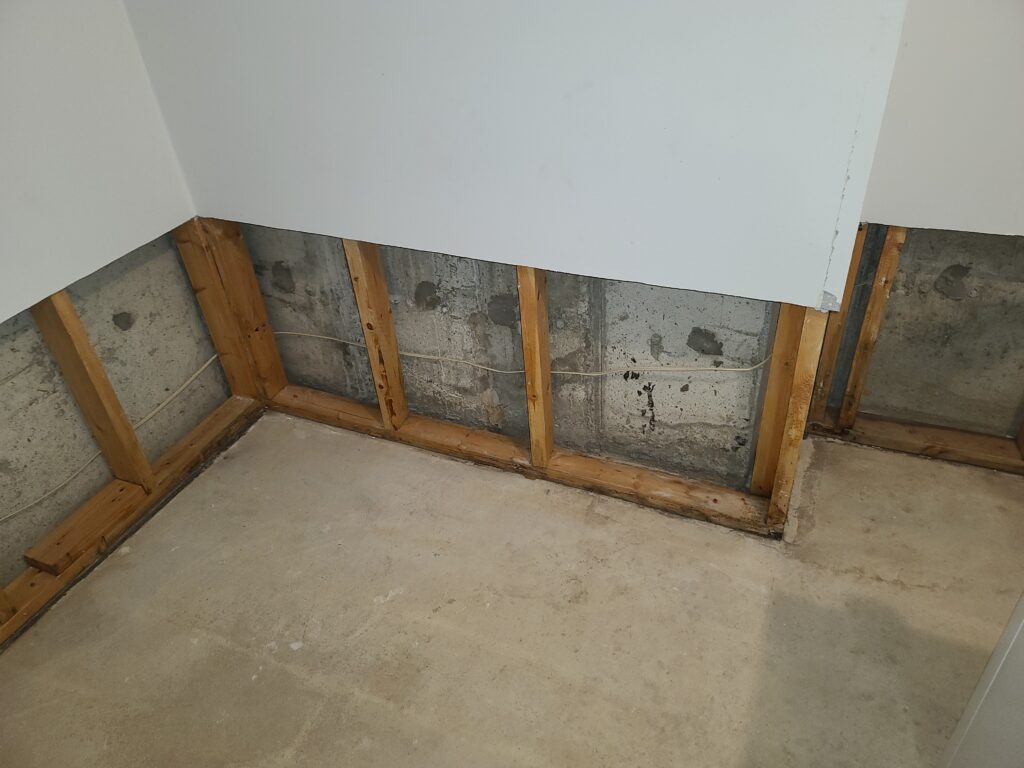
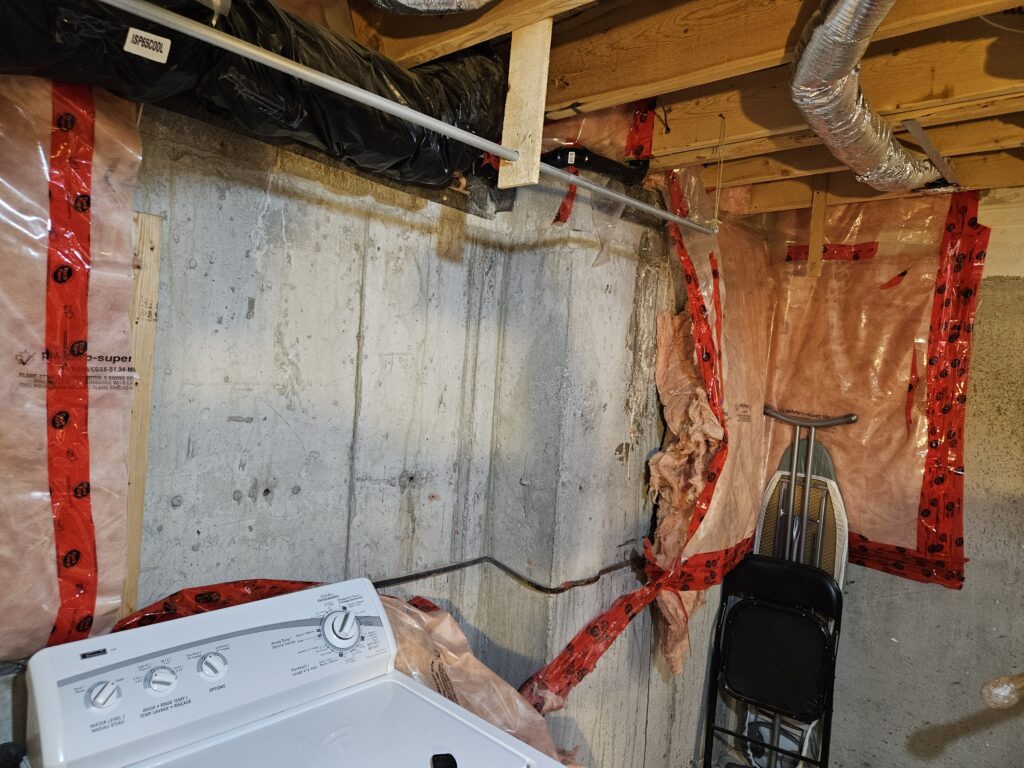
- Expose the interior wall where the leak is suspected. Remove drywall, vapor barrier, and insulation. (Figure 3)
- Connect a water hose to an outdoor faucet or any water source with enough pressure to produce a steady spray.
- Use an adjustable spray gun with a “shower” or “rain” setting.
- Spray the exterior foundation wall—Since we’re testing for basement leaks, make sure to spray only the lower portion of the exterior wall, specifically where the top of the foundation wall is exposed above grade. (Figure 4)
- Spray in 15-minute cycles, then pause for 5 minutes to allow water to travel.
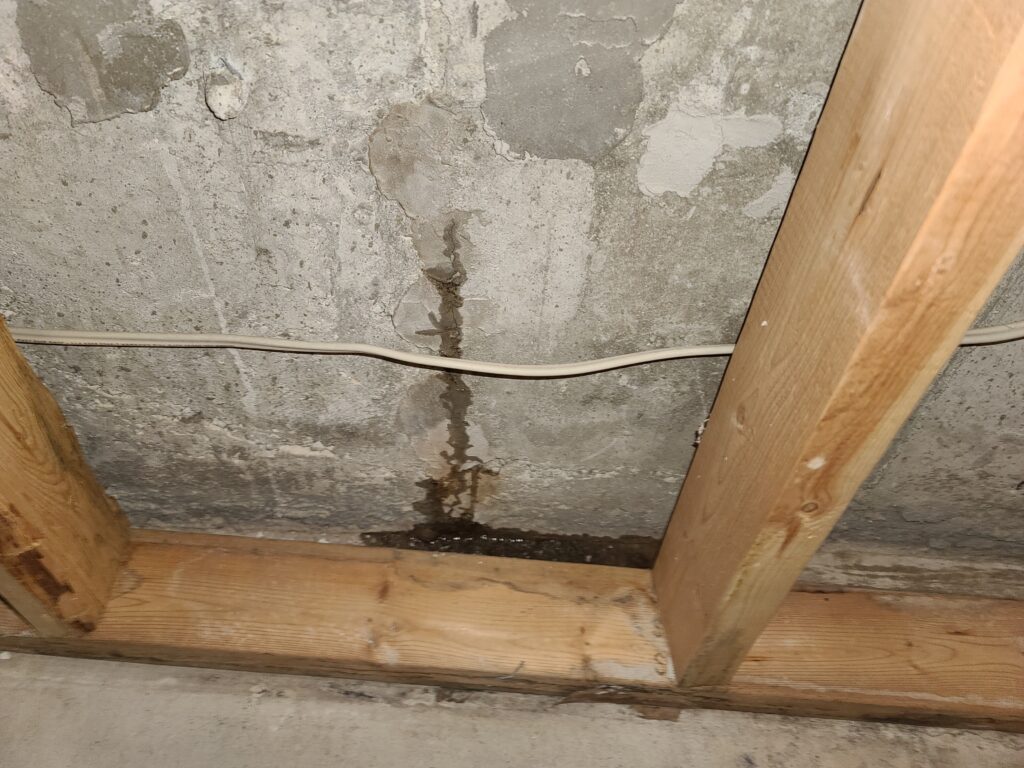
- Monitor the interior wall from inside for any signs of active leakage.
- If you see water coming through, stop the test. You’ve confirmed the leak. (Figure 5)
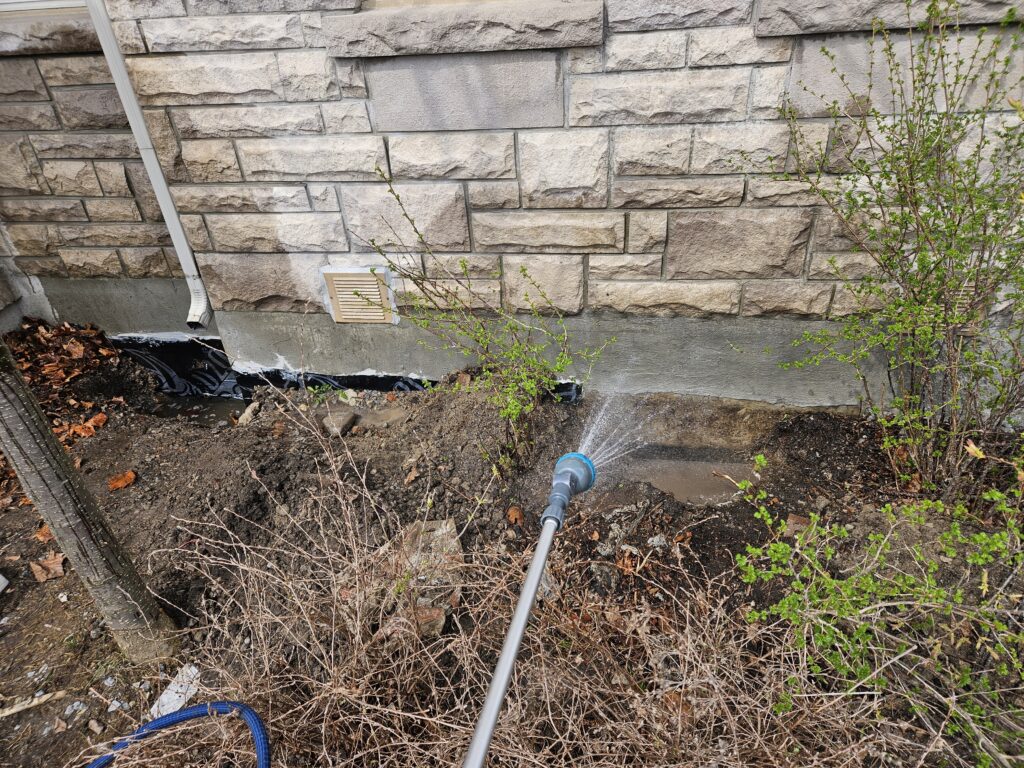
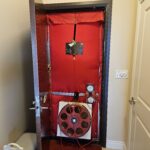
While it may sound like common sense, it’s crucial to ensure you’re spraying the correct locations to get accurate results. Therefore, test each suspect area separately. Don’t flood the entire wall at once; you’re trying to isolate the source of the leak. In some stubborn cases, contractors use blower door systems to simulate negative pressure (read article: How a Blower Door Test Helps Detect Wall Leaks and Improve Water Testing Accuracy), but it’s usually not required for foundation wall testing.
What Causes Basement Leaks?
Most basement water problems in Toronto are caused by:
- Poor grading
- Missing or damaged waterproofing
- Cracks in the foundation wall
Let’s explain.
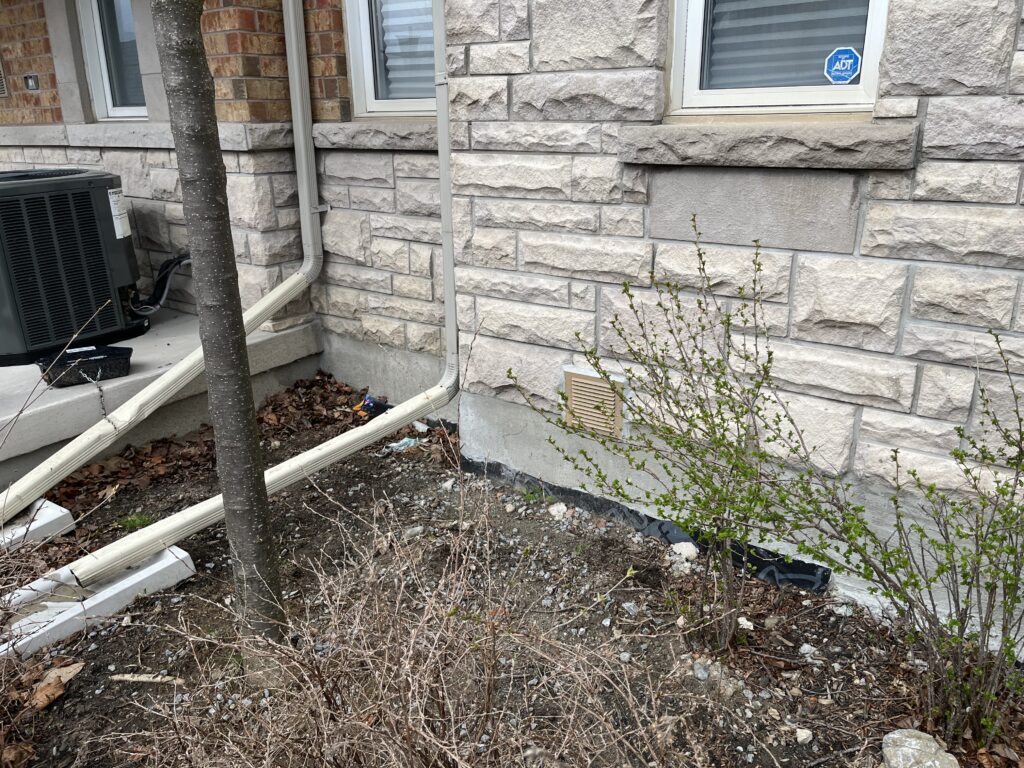
Poor Grading
When it rains, surface water accumulates near the home. If your landscaping slopes toward the house instead of away, that water flows directly to your foundation (Figure 6). This is the first line of defense, and it’s often ignored.
Damaged or Missing Waterproofing
Here’s the truth: most homes in Toronto are built with dampproofing on their foundation walls. Let’s make one thing clear! Dampproofing is not waterproofing— See article: ‘Waterproofing vs. Dampproofing – Why It Matters’ for an in-depth comparison of both systems.
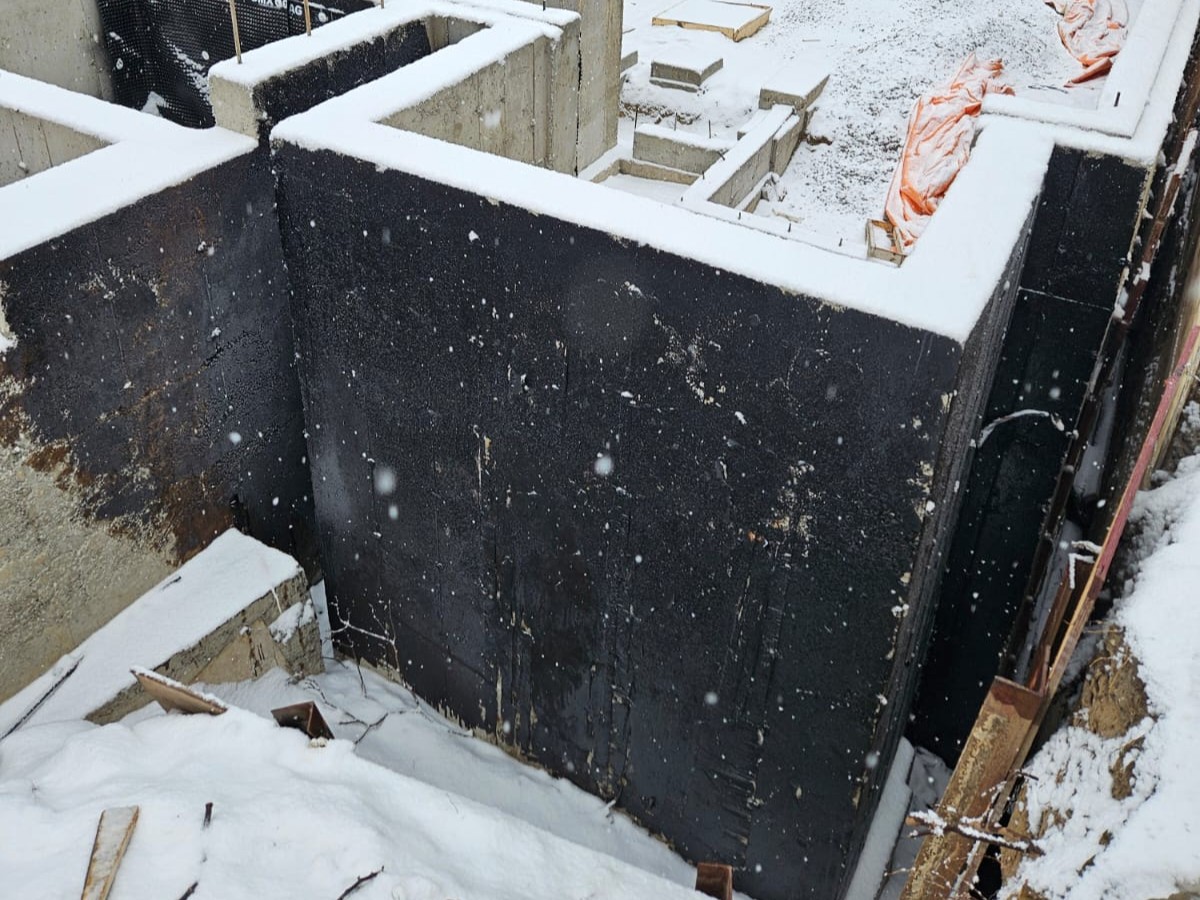
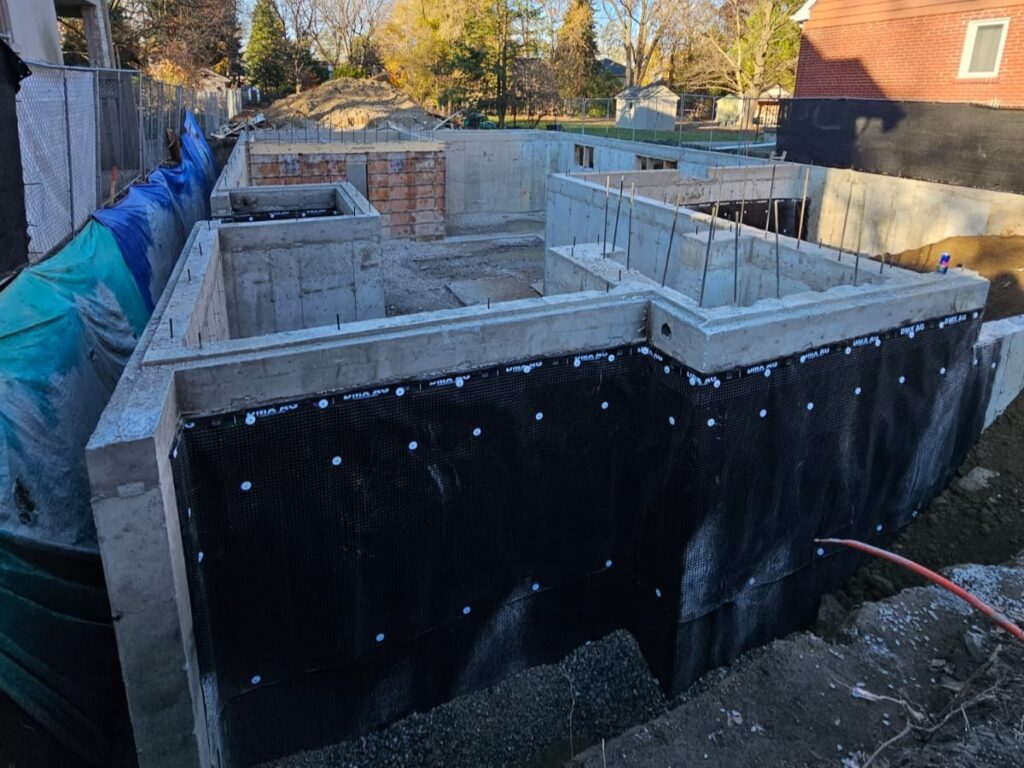
Suppose the builder has done a good job of installation. In that case, dampproofing material is sprayed over the foundation wall and covered with a dimple drainage board, then secured at the top with termination bars (Figures 7 & 8).
If this process is skipped or done poorly, water will find its way through. This means your main line of defence is compromised. Unless you don’t have solid plans for addressing this, the leaks are way more persistent than what you think.
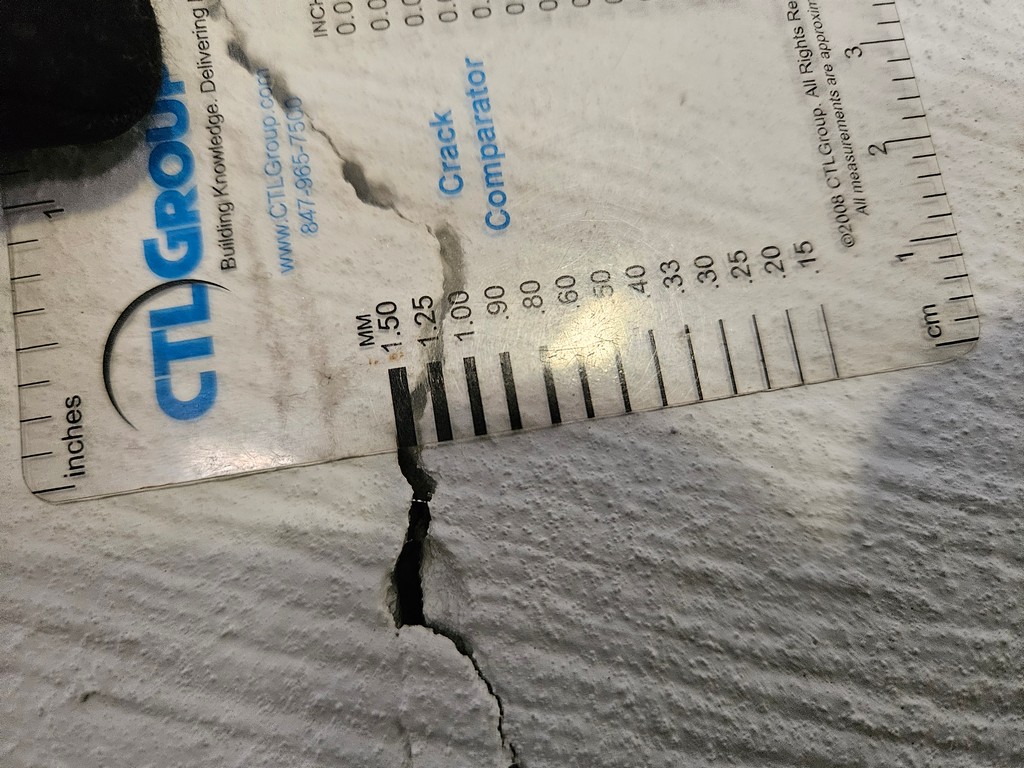
Foundation Cracks
Even if the waterproofing appears to be intact, small cracks in the concrete can act like highways for water intrusion. These are often caused by natural settlement and shrinkage.
What’s the Best Way to Fix a Leaky Basement?
Let me show you what real waterproofing looks like.
Case Study: Townhouse in North York
I believe the best way to explain this is through real stories and hands-on examples. So, here’s a summary of one of our recent basement leak repair projects.
A homeowner contacted us after noticing water seeping through her basement wall every time it rained (Figure 9). The wall in question faced the street and had landscaping built up against it.
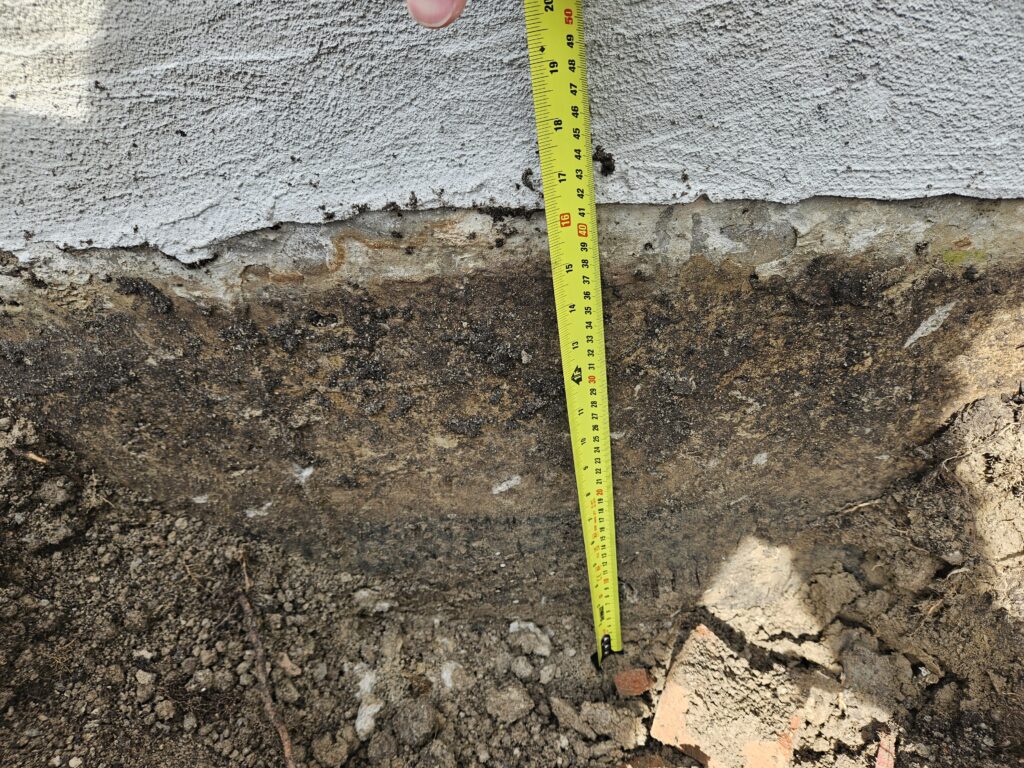
We immediately spotted poor grading. To investigate further, we excavated a test pit against the wall in the landscaped area and, unsurprisingly, found no proper waterproofing. Just a thin black coating, likely paint. Remember? the traditional dampproofing system includes a coating sprayed along the full height of the foundation wall, followed by drainage boards for protection. In this case, none of that was present (Figure 10).
We knew the constant leaking was due to the lack of a proper waterproofing membrane on the exterior foundation walls. So, what’s the solution?
This is usually when contractors jump in with all the “affordable” fixes, trying to undercut each other, offering quick patches and warranties that last longer than they’ve been in business. You’ve heard the pitch.
But if you can ignore those not-so-convincing claims for a second, here’s the fact: the best (and the only correct) way to stop basement leaks is to waterproof the exterior of the foundation. And let me be clear: I said waterproof, not dampproof. We’re not making the same mistake twice.
Yes, it costs more, and yes, it takes work. But do you want to fix the problem once and be done with it, or keep bleeding money year after year, just like your walls will keep bleeding water?
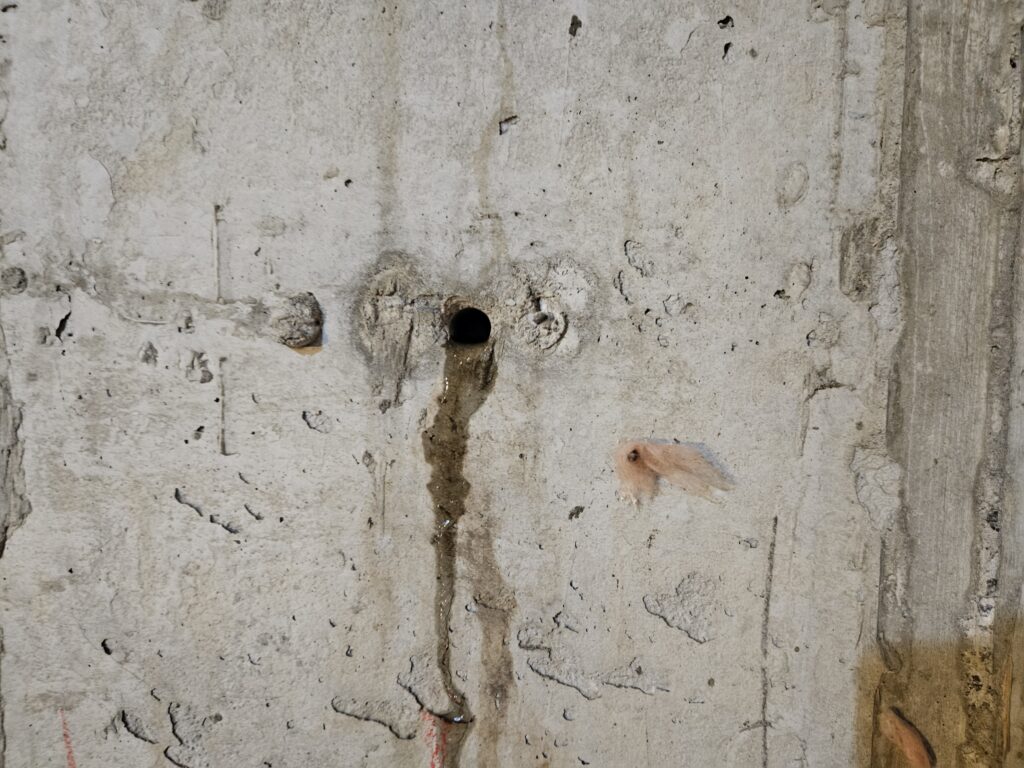
We ran a water hose test. Within minutes, water leaked into the basement through the form tie holes (Figure 11). Again, no surprise there. By the way, who leaves the form tile holes like that?!
Here’s what we did. I’ll break down the main steps without getting too technical, because honestly, that’s my job, not yours. You just need to get the basics and know what’s being done.
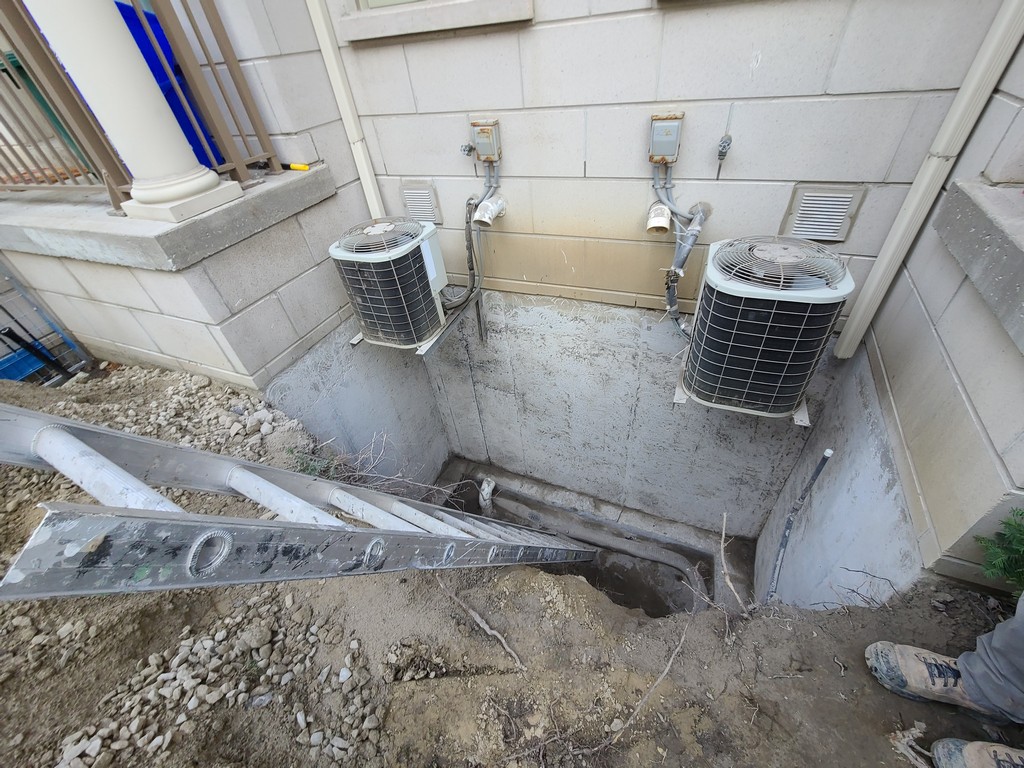
- Excavation
We fully exposed the foundation wall. Upon inspection, we noticed hairline cracks that were letting water through (Figure 12). - Surface Prep
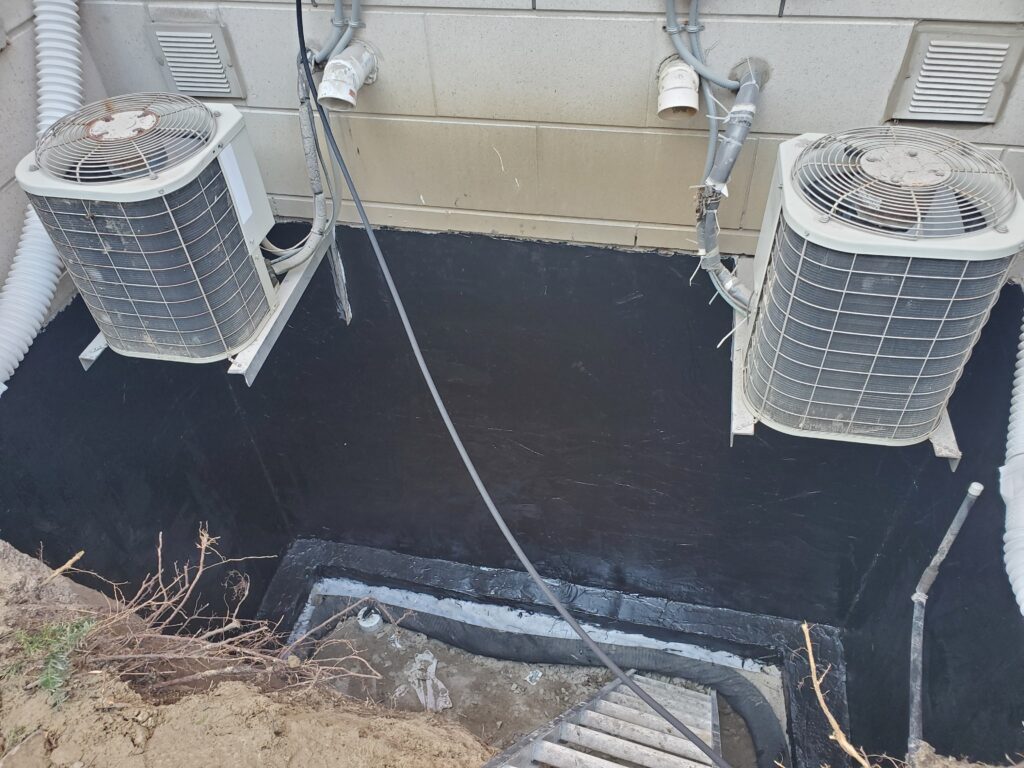
Once we exposed the foundation wall, we sandblasted it to remove all the dirt and organic stuff so the new membrane could adhere to it. We needed the concrete to have the right texture (a CSP of 3 or 4), and once achieved, it was ready for waterproofing (Figure 13). - Waterproofing
We applied a liquid waterproofing membrane (Aqua-Bloc 770-06) to the entire surface of the exposed foundation wall (Figure 14). - Drainage System
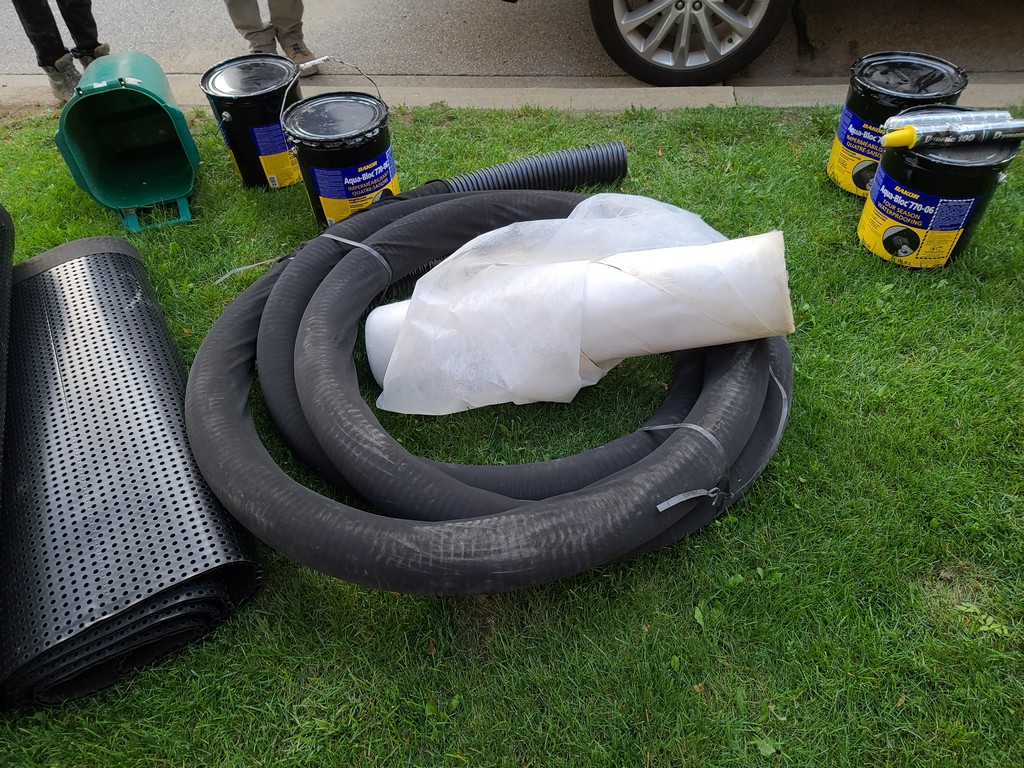
Once the membrane cured, a new dimple board and termination bar were installed to protect the membrane and manage hydrostatic pressure by channeling down the water. We also replaced the weeping tile at the footing level (Figure 15). - Backfilling & Restoration
The area was backfilled, graded properly, and sod was reinstalled. The leak stopped, and there was a smile on the homeowner’s face 😊
Final Words
Leaky basements are so common in Toronto that I’m tired of hearing about them. It’s a combination of our high water table and the shortcuts some builders and contractors take during the construction phase, like skipping proper foundation waterproofing. So, trust me, you’re not alone.
The real problem? These issues stay hidden until mold shows up or your basement starts smelling like a wet locker room. That’s not your fault. But what is in your control is how quickly you act once you notice something’s off.
Don’t ignore water stains, musty smells, or that damp basement feeling. If your car leaked every time it rained, you’d get it fixed, right? Well, this is your home. You live here (hopefully not in your car).
If you want to go for an exploration, go ahead and do the hose test I talked about earlier. It works as long as you follow the exact steps. But beyond that, it’s my job to take it from there.
Once you know the walls are leaking, call me. I’ll investigate the issue, break things down clearly, and give you a long-lasting solution.
So next time you spot a leaky basement, don’t just live with it—reach out.
Thank you for this article. It was very educational and interesting. I have a similar situation in my basement where I know there is moisture on my walls because I can smell the dampness but can’t see because my basement is finished. In these situations, where you know there is leakage, how can you confirm? Should I remove the drywall?
Thank you for your feedback. In situations where the basement walls are canceled with interior finishes and the exact location of the leaks are not clearly visible, you may want to remove a small section of the drywall at key locations where you suspect leakage. You can cut a small section of the drywall just large enough to put your hand inside and be able to touch the bottom sills and the backside of the foundation walls to inspect for moisture. Then, you can run your investigation and do a strategic water test, as explained in the article, and confirm the leaks. Unfortunately, a bit of interior finishing work is required in these situations.
Pingback: Blower Door Test for Wall Leaks | Improve Water Testing Accuracy in Your Home
Pingback: Basement Finishing Guide: All the Basics You Need to Know
Lovely blog! I am loving it!! Will be back later to read some more. I am taking your feeds also